Create your account
Summary
Welcome to Costimizer! This guide walks you through the initial setup phase, from creating your account to connecting your first cloud data sources. Whether you are a CFO looking for immediate financial visibility or an engineer ready to deploy our Agentic AI optimization, you are in the right place.
Estimated time: 8 minutes
Required role: Organization Manager (for invitations)
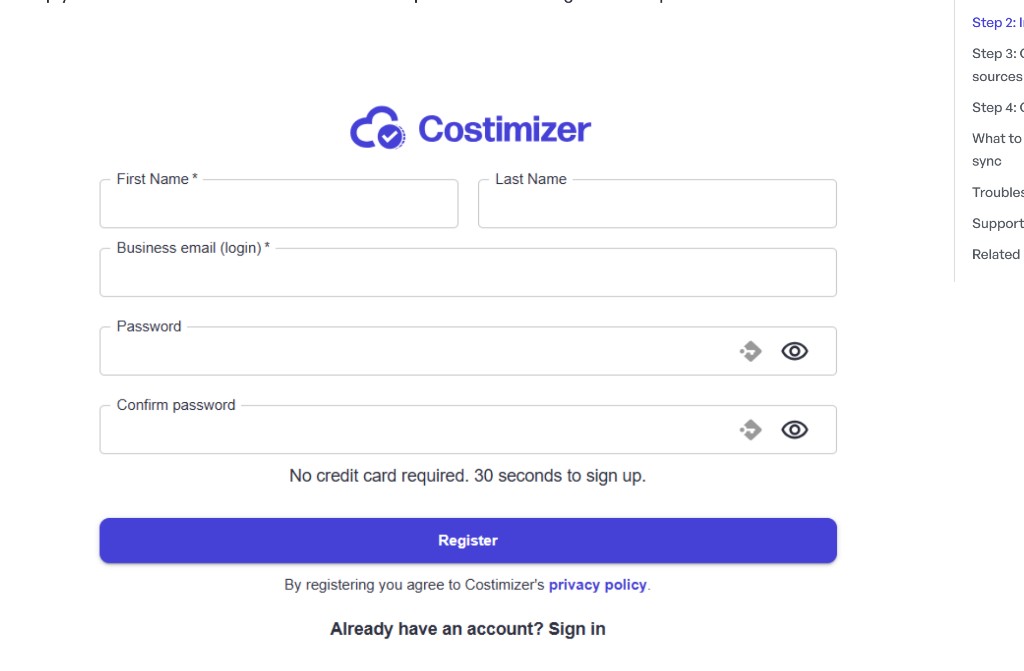
Step 1: Create your account
To begin using Costimizer, you must first create an account or log in to an existing one.
- Navigate to the Costimizer registration page at dashboard.costimizer.ai/register.
- Provide your standard professional details:
- First Name
- Last Name
- Business email (login)
- Password & Confirm password
- Click the Register button.
Upon your first successful login, you will be greeted by the Welcome to Costimizer pop-up on your main Overview page.
Step 2: Complete organization setup
After first login, Costimizer redirects you to Initialize (/initialize):
- Accept pending invitations to join existing organizations, or
- Create a new organization if you are the first user
Invite teammates (optional)
Navigate to Settings → User Management to view members and roles.
- Click Invite employees
- Enter email addresses
- Assign a role:
- Organization Manager — full org access including data sources and invites
- Manager — manage pools and resources in assigned scope
- Engineer — manage own resources and book environments
- Member — read-only access in assigned scope
- Send invitations
Ask invitees to accept the email link and confirm they see the Home dashboard for the correct organization.
What you'll see in Costimizer
- Home dashboard after successful setup
- Settings → User Management listing all org members
- Pending invitations until accepted
Key takeaways
- Cloud data source connection is the next step after account setup — see Connect your first cloud
- Use pool-scoped roles when teams should only see their cost allocation slice
- Organization Manager is required to connect data sources and manage billing