Connect your first cloud
Summary
Let's get your cloud connected so you can start saving today. This guide covers initial dashboard setup, an overview of cloud data source connections, and how to choose your operation mode.
Estimated time: 10 minutes (plus 2–24 hours initial data sync)
Required role: Organization Manager or user with Manage Cloud Credentials permission
Step 2: Initial dashboard setup
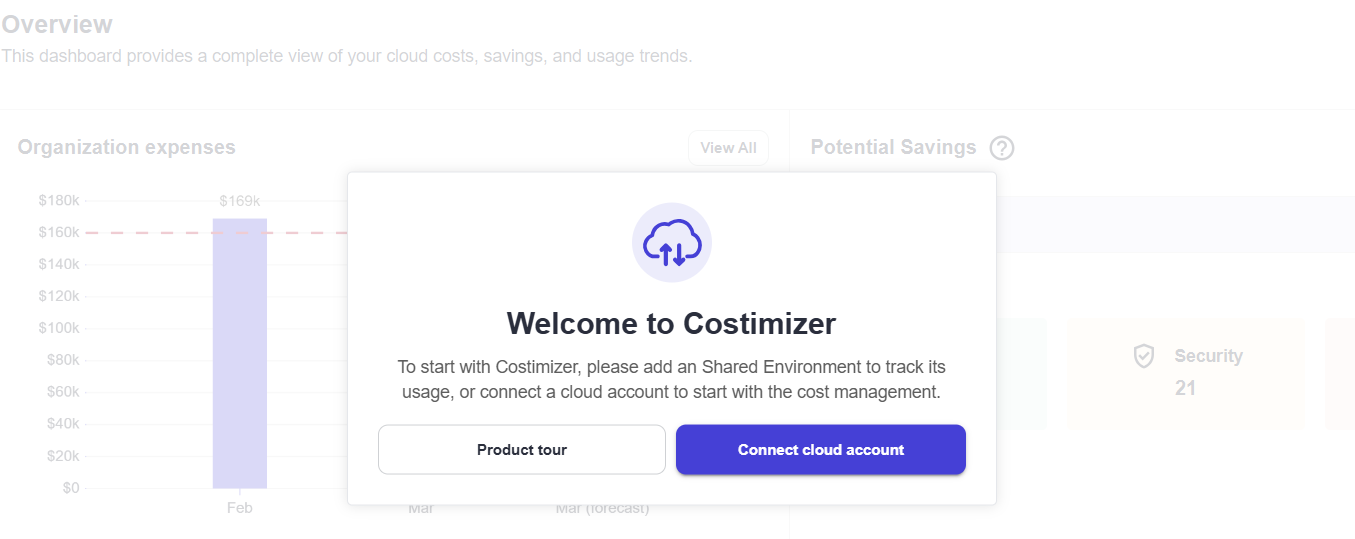
Upon your first successful login, you will be greeted by the Welcome to Costimizer pop-up on your main Overview page.
To start tracking your usage and enabling our cost management features, you will be prompted to either add a Shared Environment or connect a cloud account directly.
Simply click the Connect cloud account button to proceed to the integration setup.
Step 3: Connect your cloud data sources
In the Connect Data Source section, you can configure integrations for various cloud providers like AWS, Azure, GCP, and Kubernetes.
Select your provider below to view the specific connection steps:
- AWS connection — Assumed Role (recommended), Root account, or Linked account
- Azure connection — Subscription or Tenant
- GCP connection — Project or Tenant
- Kubernetes connection — Helm-based metrics collector
See Connect a Data Source (overview) for all supported providers.
Costimizer requests read-only access to billing and resource metadata. The only write permission used (with your approval) is updating resource Tags for allocation.
Step 4: Choose your operation mode
Once connected, Costimizer allows you to choose how our Agentic AI interacts with your environment:
- Visibility & Recommendations (Read Billing + Read Resources): The safest starting point. Costimizer reads your billing and resource data to flag anomalies, idle resources, and right-sizing opportunities. Your team manually reviews and applies the changes.
- Autonomous Execution (Read/Write): Ready to put FinOps on autopilot? Grant Costimizer execution permissions to automatically park idle resources on schedules and safely downsize over-provisioned VMs.
What to expect next: The initial data sync
Cloud providers like AWS, Azure, and GCP process billing files in batches. Most cost data appears in your Costimizer dashboard typically within 4 hours, though it can take up to 24 hours in some cases depending on your provider. The Costimizer UI will show you a sync status indicator so you can track progress.
While you wait, we recommend:
- Setting up Cost Budgets — Define your monthly limits so we can alert you before you overspend.
- Inviting Your Team — Add your engineering and finance leads to the platform so everyone speaks the same language.
- Reviewing Tag Governance — Check out our virtual tagging features to prepare for accurate chargebacks.
- Creating Pools — Group your resources by team, environment, or project so each stakeholder can see their own cost slice. See Set up pools.
- Setting Up Policies — Define automated rules to flag or act on anomalies and cost overruns before they grow.
Troubleshooting
- Connection fails immediately → verify IAM role ARN, external ID, and billing export configuration. See Connection failures
- No cost data after 4 hours → see Missing cost data
Support
If you encounter any issues during setup, our FinOps support team is ready to help at contact@costimizer.ai.
- Email: contact@costimizer.ai
- Phone: +91 931 033 2298
- Live Demo: dashboard.costimizer.ai/live-demo
The live demo environment lets you explore all dashboards and features without connecting a real cloud account — useful for getting familiar with the platform before going live.