RBAC
Summary
Costimizer's Role-Based Access Control (RBAC) lets you securely manage who can access your FinOps data and what actions they can perform. By combining roles (what users can do) with pools, cloud accounts, or organizations (where they can do it), you can scale cloud cost management across teams, projects, and CI/CD pipelines while preserving clear security boundaries.
Step-by-step setup
1) Open User Management
-
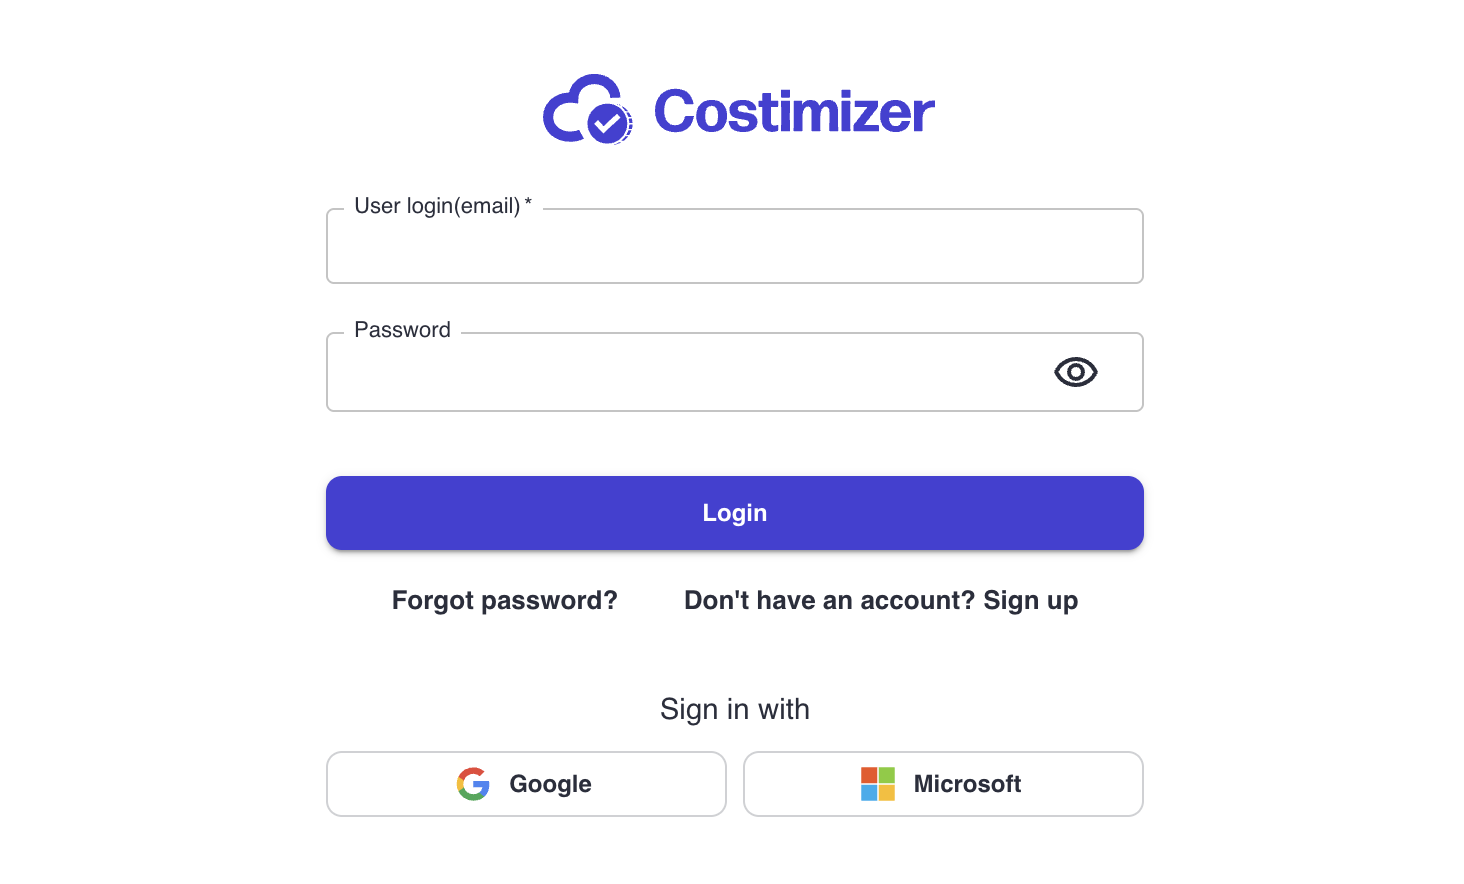
Log in to your Costimizer dashboard.
-
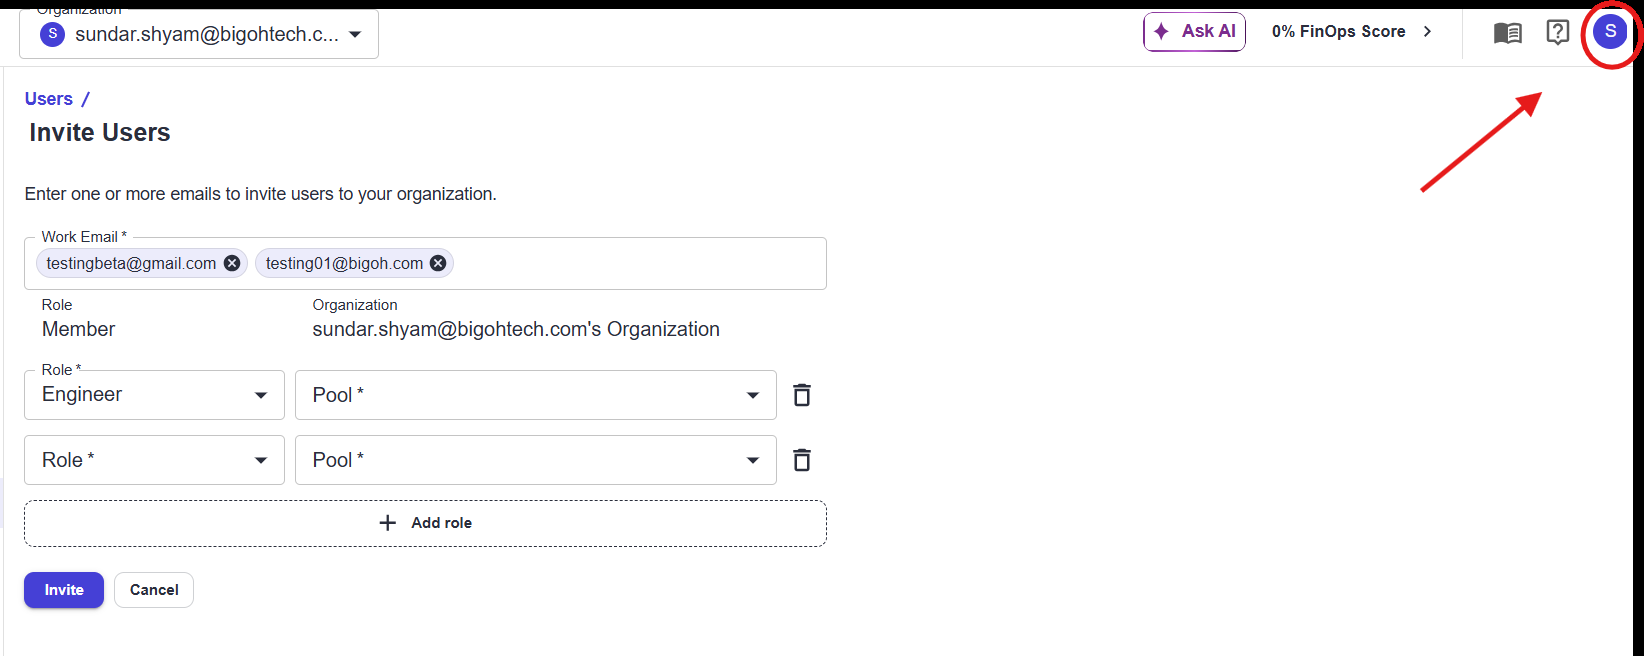
Click your profile icon in the top-right corner.
-
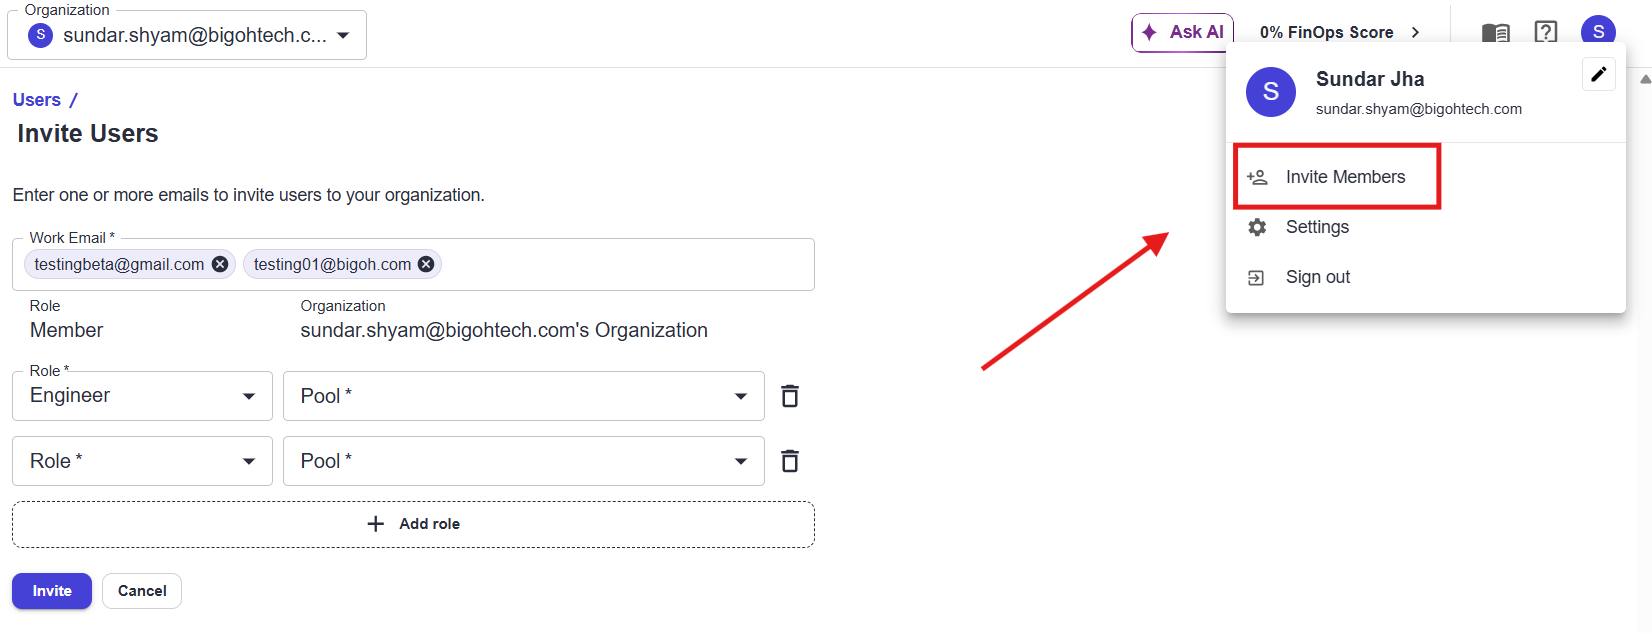
Select Invite Members from the dropdown to open the Users / Invite Users page.
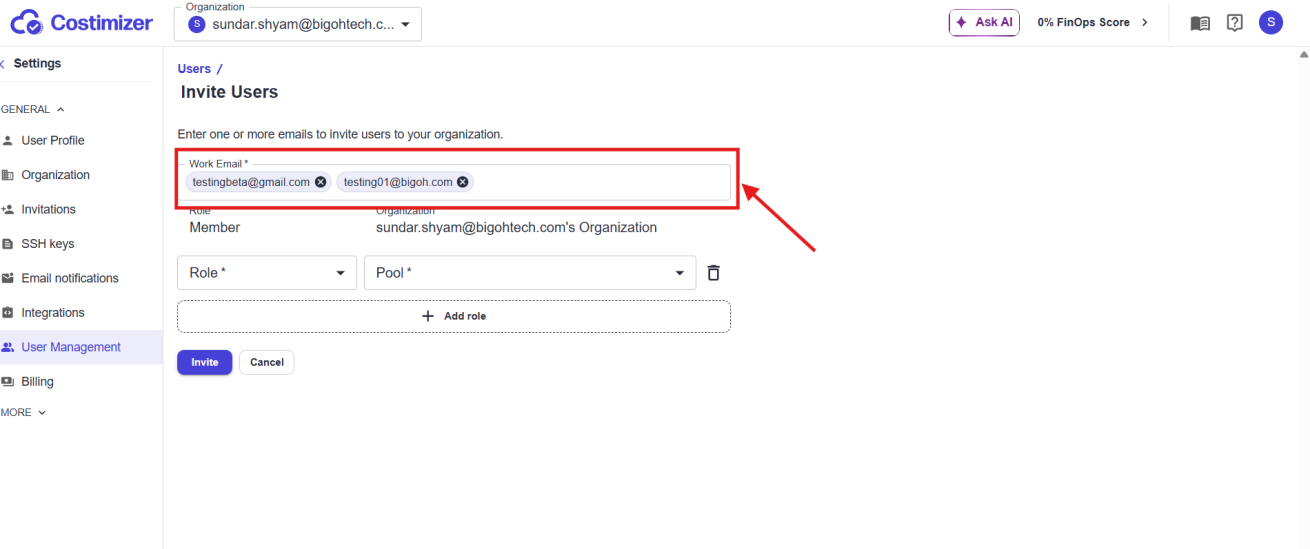
2) Add users with bulk work emails
The Work Email field supports bulk invitations:
- Type or paste an email address, then press Enter to convert it into a chip.
- Add as many emails as needed before configuring role settings.
- Every user in the current batch receives the same permissions you define.
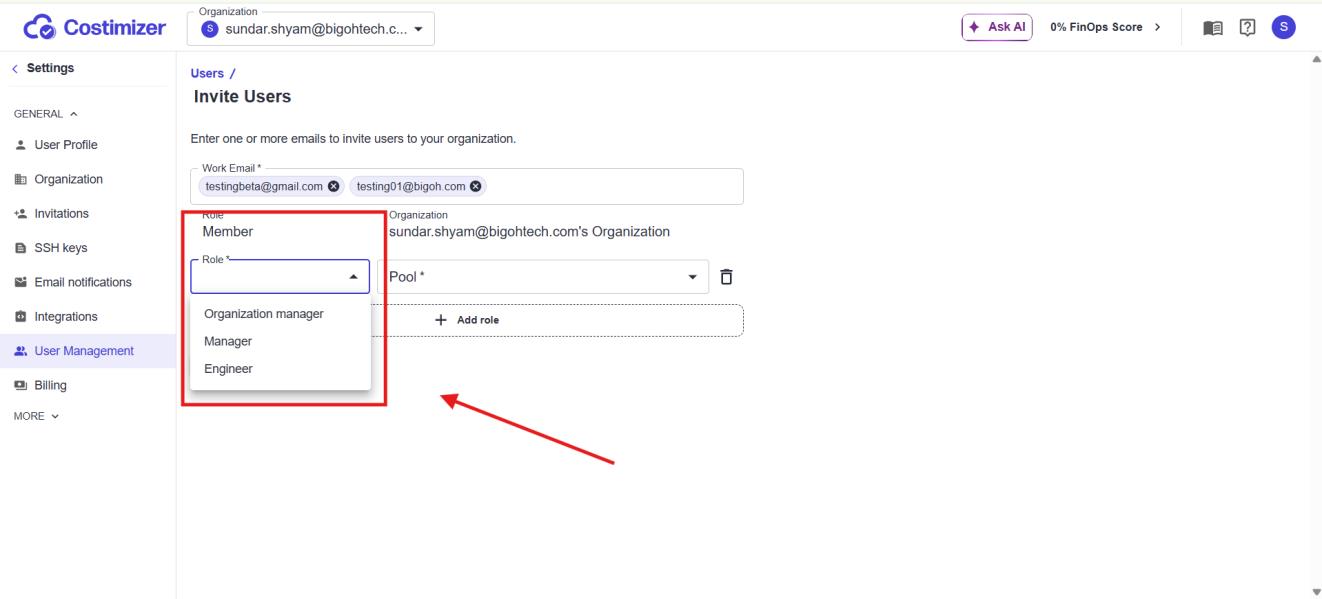
3) Select a role (permissions)
Choose one role for the invite row:
- Organization Manager (Full Read & Write): Full administrative access across data, settings, billing integrations, and infrastructure configuration.
- Manager (Scoped Read & Write): Read and write access limited to assigned pools, cloud accounts, or organizations.
- Engineer (Read-Only): Visibility into costs, dashboards, regions, and recommendations for assigned scopes without edit permissions.
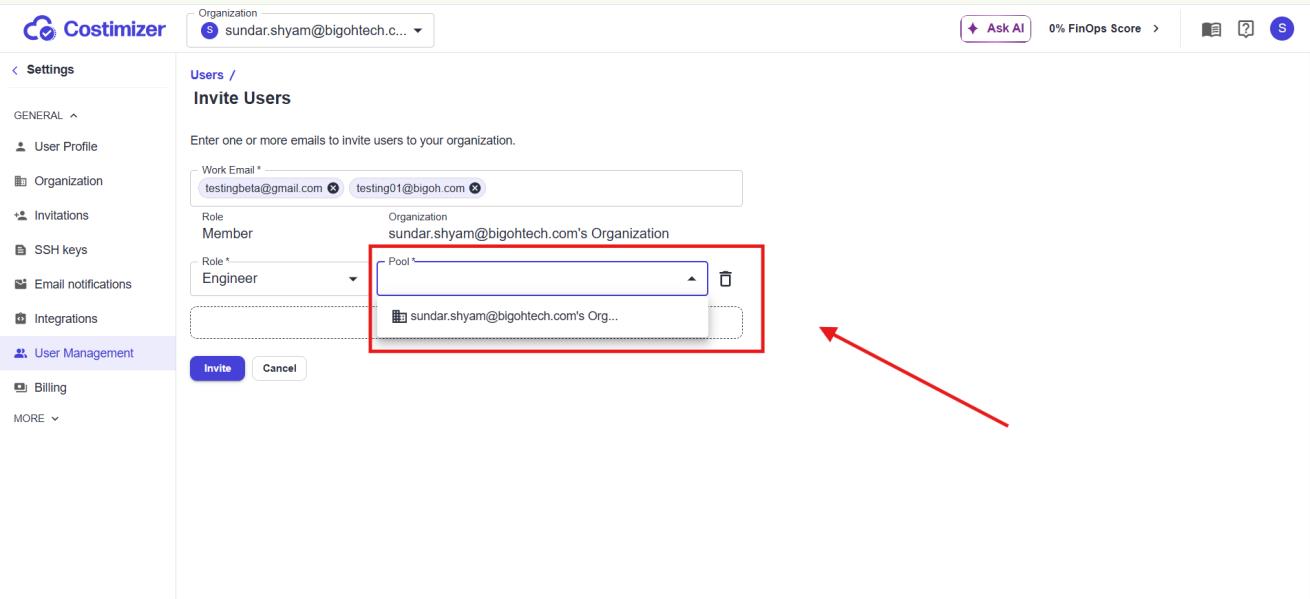
4) Assign pool or organization scope
Roles control what a user can do; pool/account/organization scope controls where they can do it.
- Use the Pool dropdown to assign the relevant team, project, or environment.
- Example: assigning Engineer in a frontend pool gives view-only access for that pool's resources.
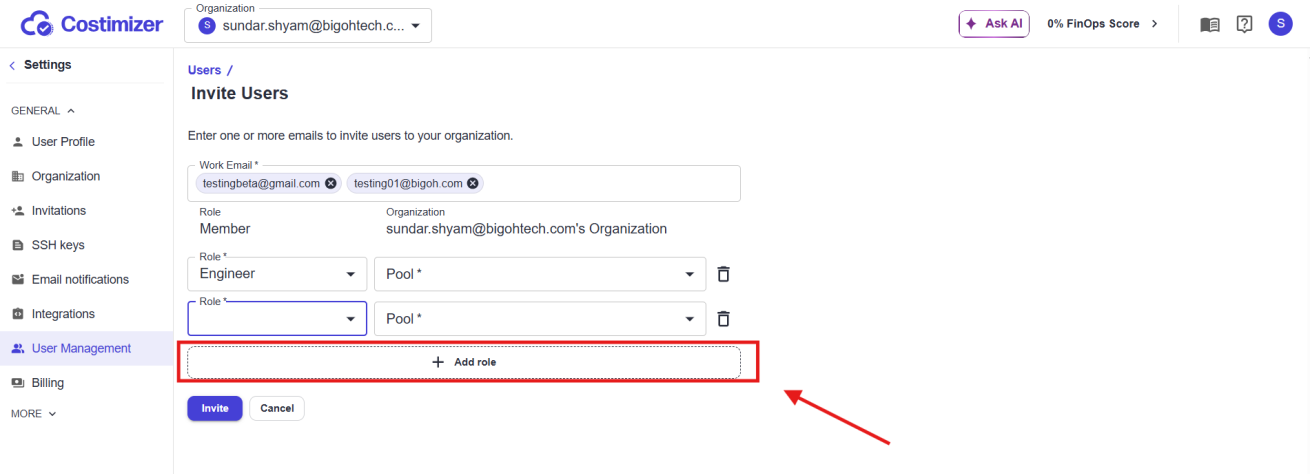
5) Add advanced multi-role assignments (optional)
Use + Add role for granular multi-scope access:
- Add a second (or more) role row for the same invited user batch.
- Assign different access levels per pool/account/organization.
- Use the trash icon beside a row to remove a role/scope pair before sending.
Example: set a user as Manager for Pool A and Engineer for Pool B.
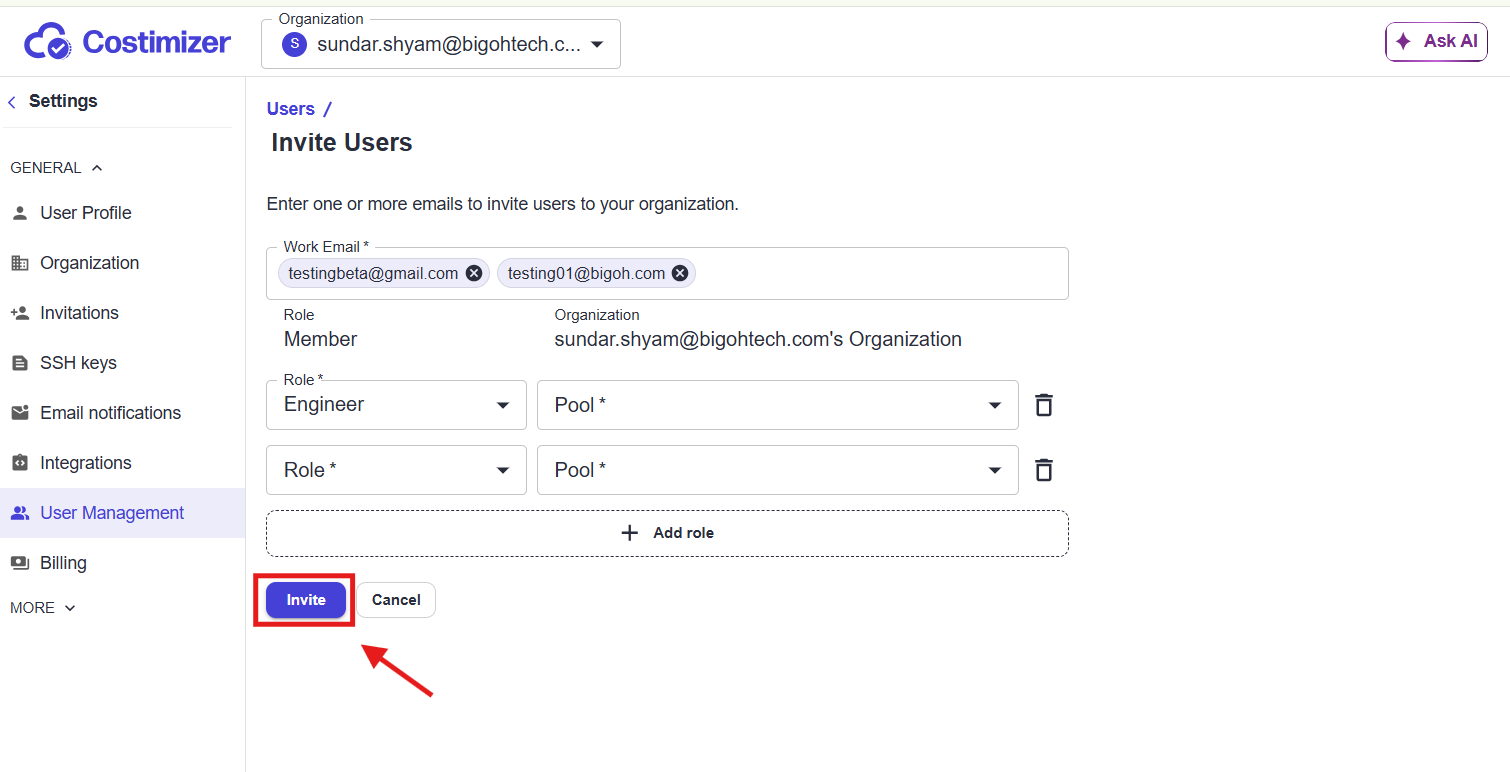
6) Send invites
After emails, roles, and scopes are configured:
- Click Invite.
- Confirm the green success banner: Users have been invited.
- Use Cancel anytime to clear the form and return to the previous screen.