Connect Azure
Summary
Connect Microsoft Azure to Costimizer using a subscription or tenant-level billing connection.
Required role: Organization Manager or Manage Cloud Credentials
Estimated time: 15 minutes
Connection options
Costimizer supports two ways to connect to Azure:
- Subscription — onboard a single Azure subscription
- Tenant — onboard all subscriptions under one Azure Tenant at once
Costimizer does not modify any Azure resources. The Reader role it requires is the minimum needed to collect cost and usage data.
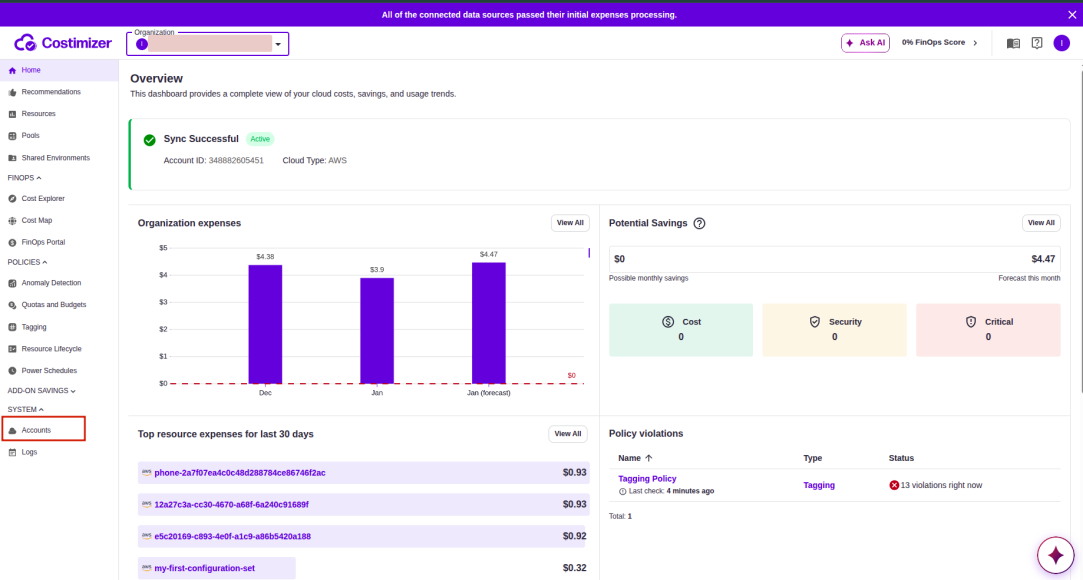
Navigate to Accounts → Connect Cloud Account → Azure.
One-time Azure setup (App Registration)
Create App Registration
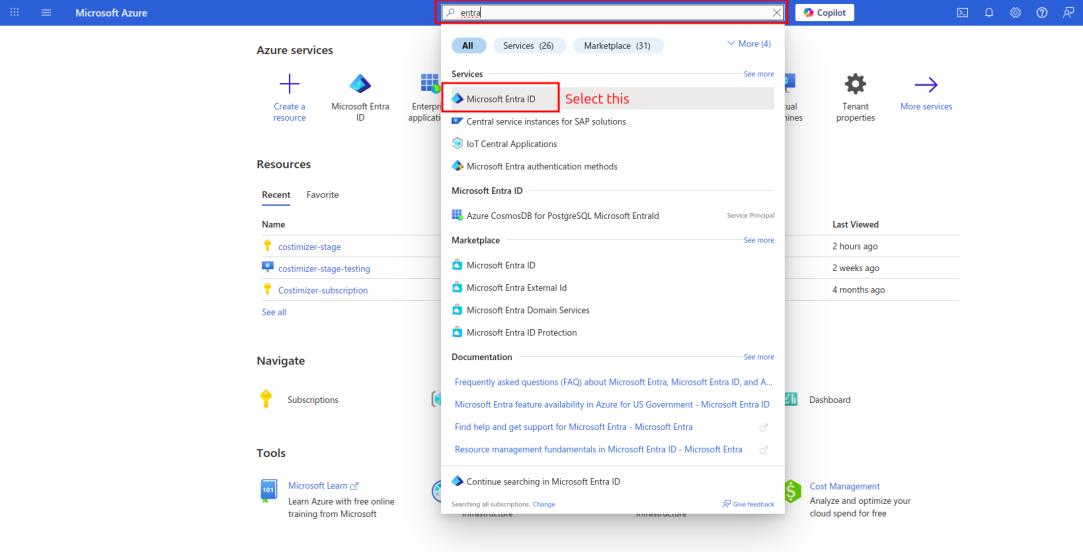
- Log in to the Azure Portal.
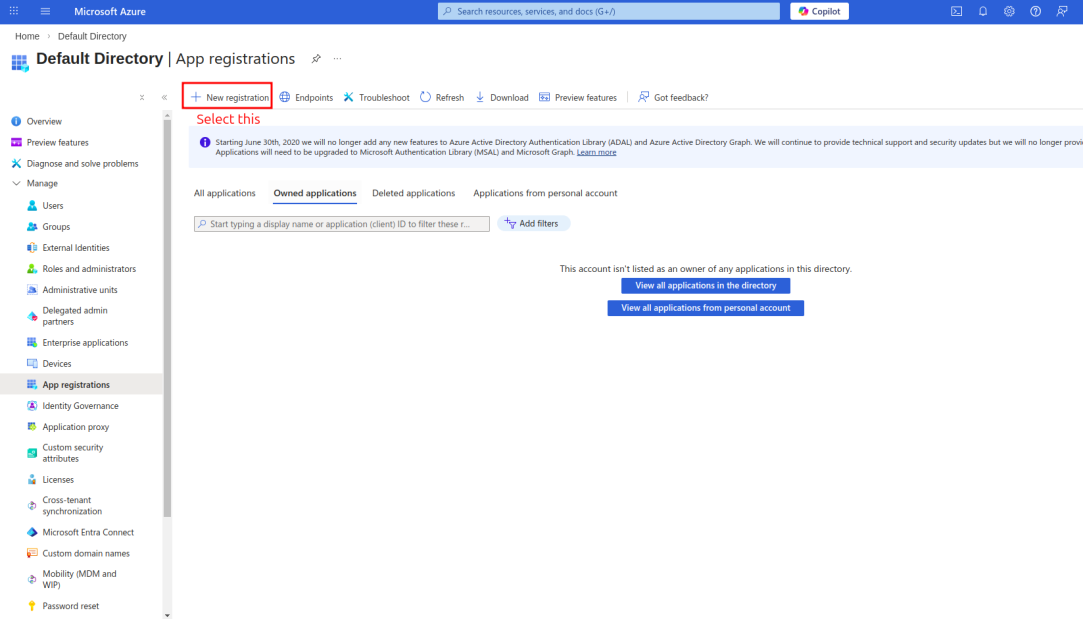
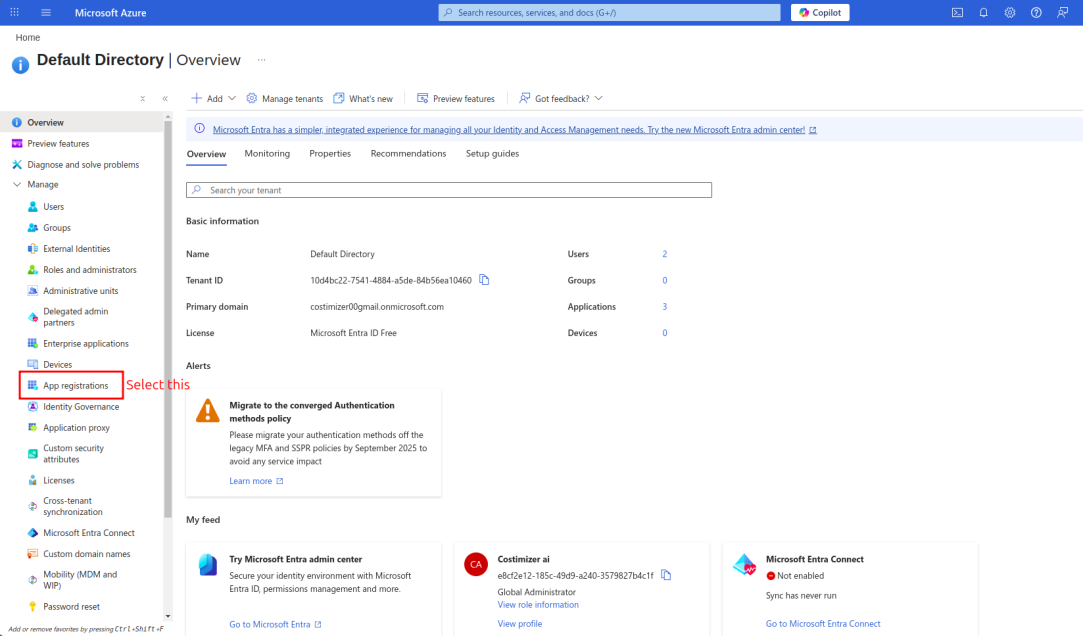
- Go to Azure Entra ID (Active Directory) → App registrations.
- Click + New registration.
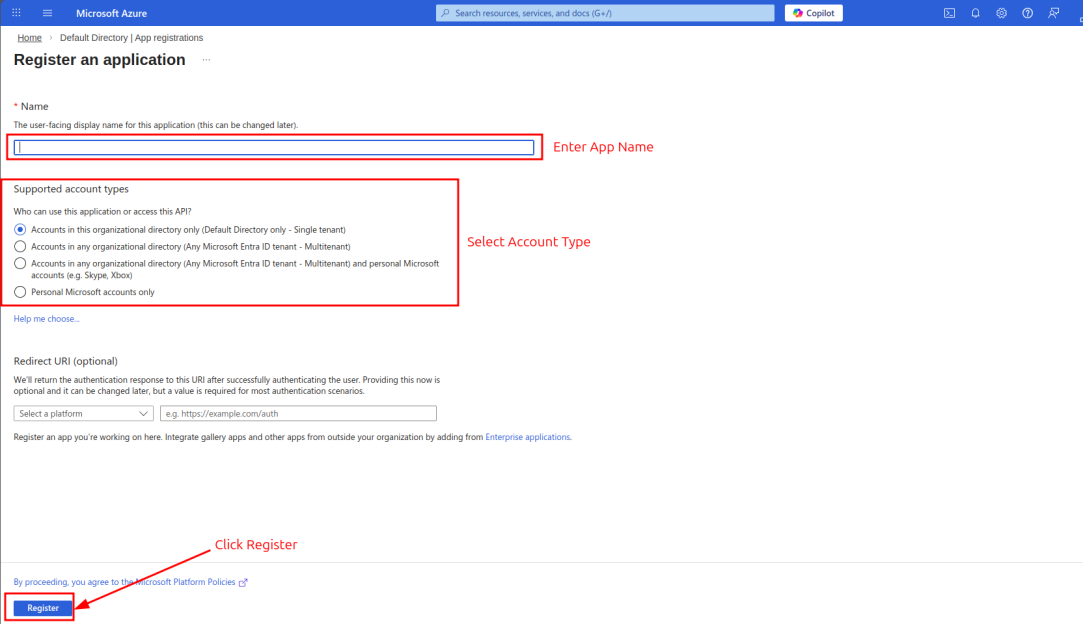
- Name:
costimizer.ai(or any name you prefer). Keep the default account type. - Click Register.
- Copy and save the Application (Client) ID and Directory (Tenant) ID from the Overview page.
Assign Reader role on subscription
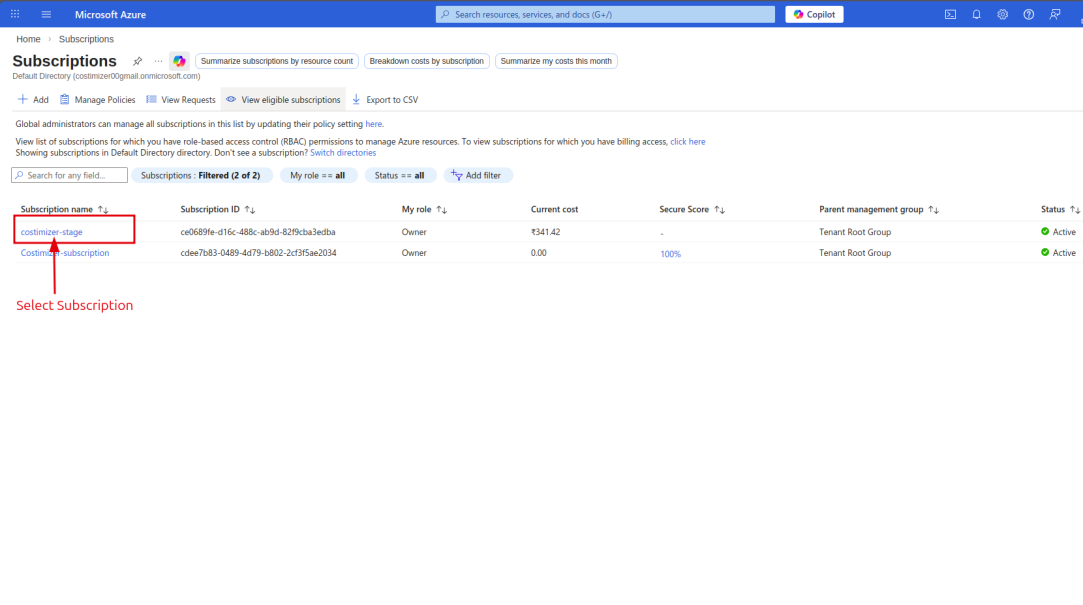
- Go to Azure Portal → Subscriptions.
- Select the subscription to onboard.
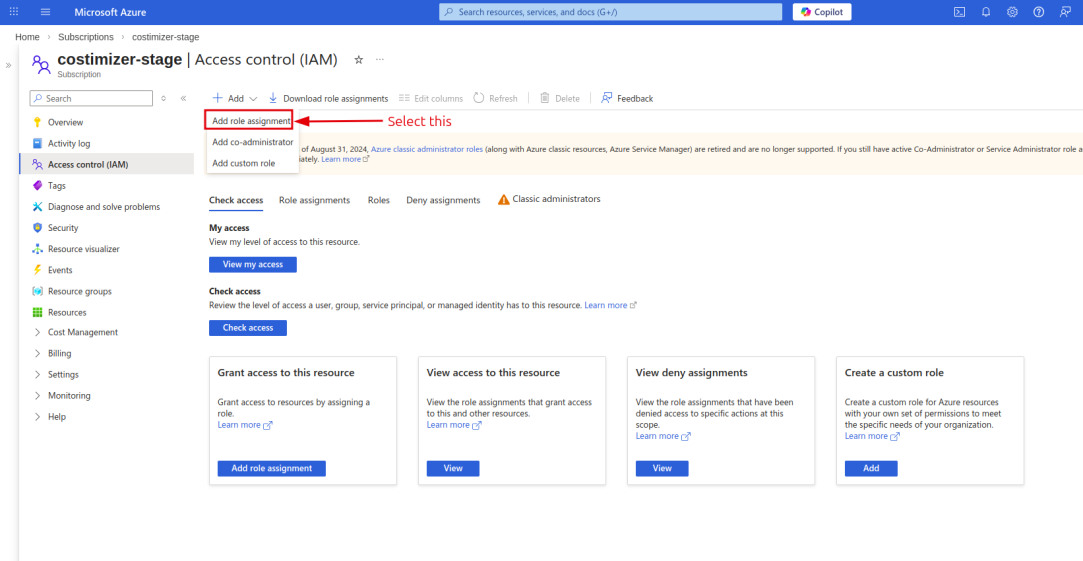
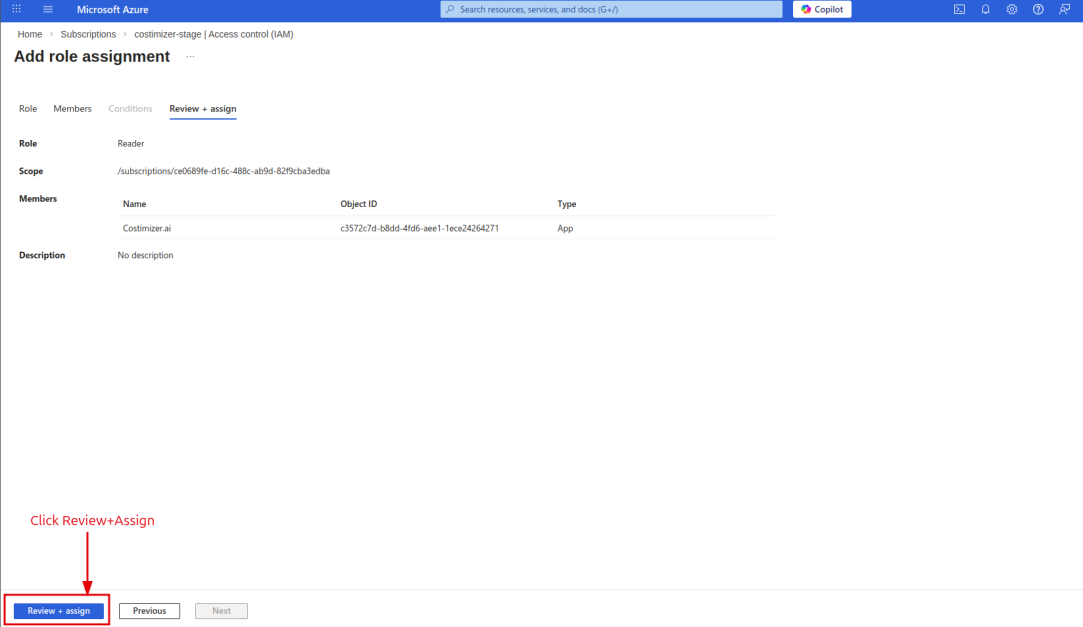
- Open Access Control (IAM) → + Add → Add role assignment.
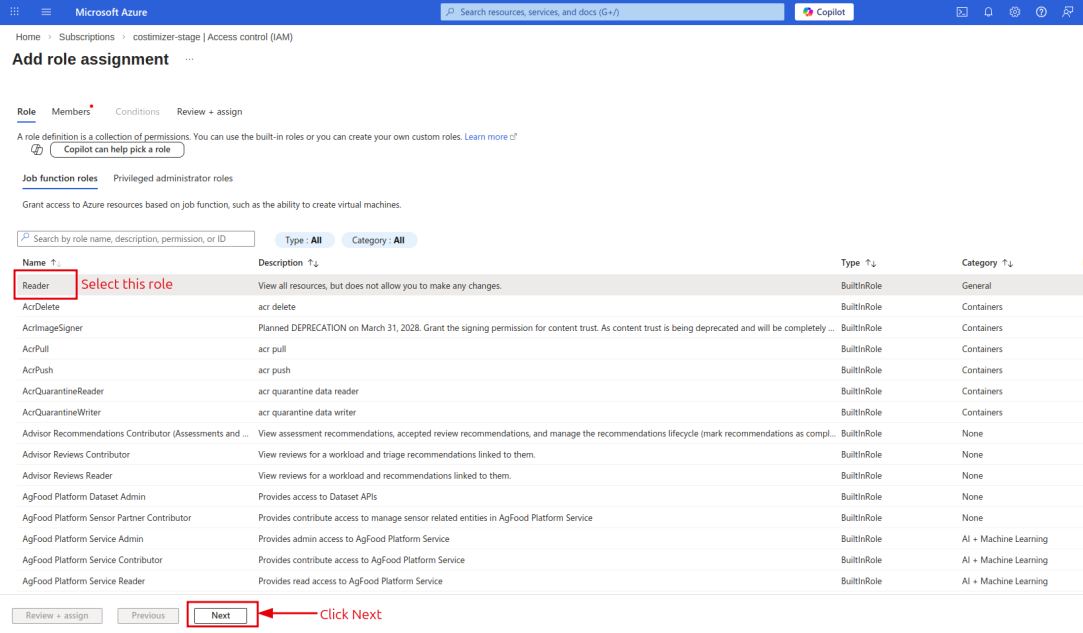
- Role: Reader.
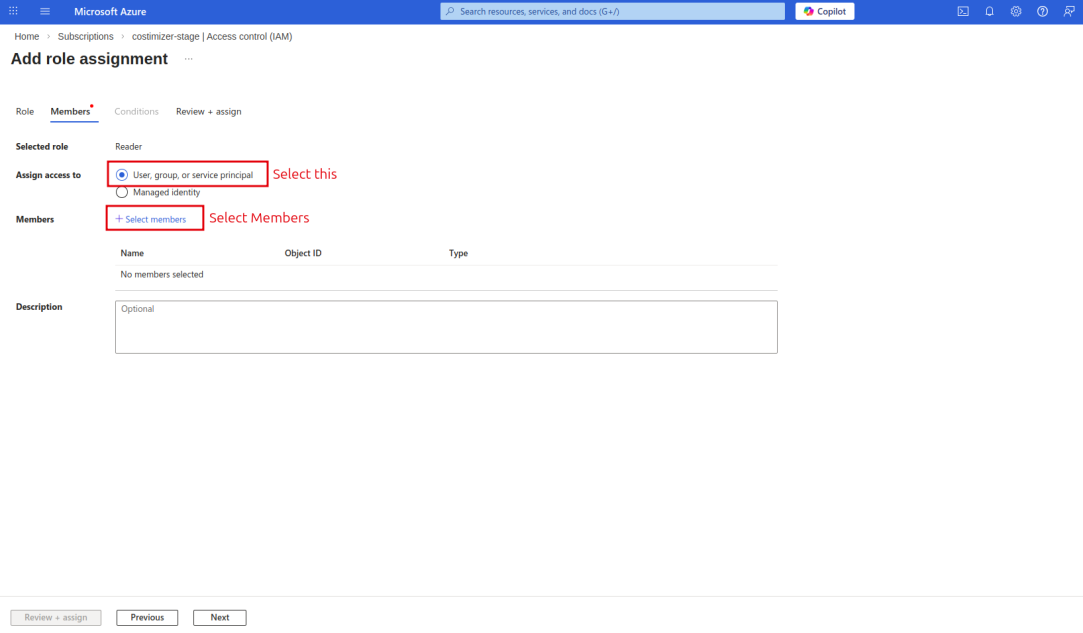
- Assign access to: User, group, or service principal.
- Select the costimizer.ai app you just registered.
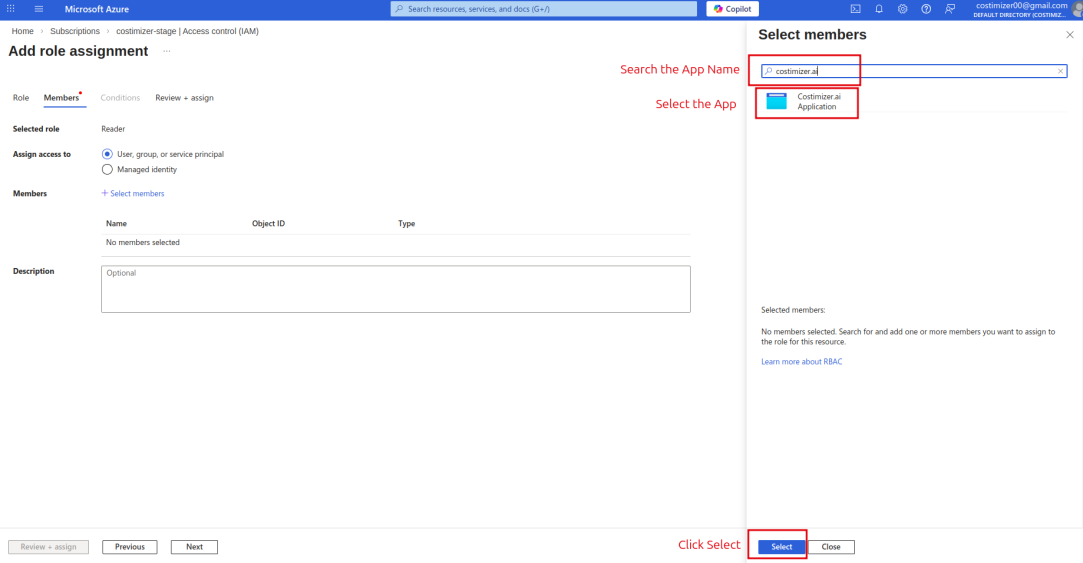
- Click Save.
If connecting at the Tenant level, repeat the Reader role assignment on every subscription you want Costimizer to access.
Generate client secret
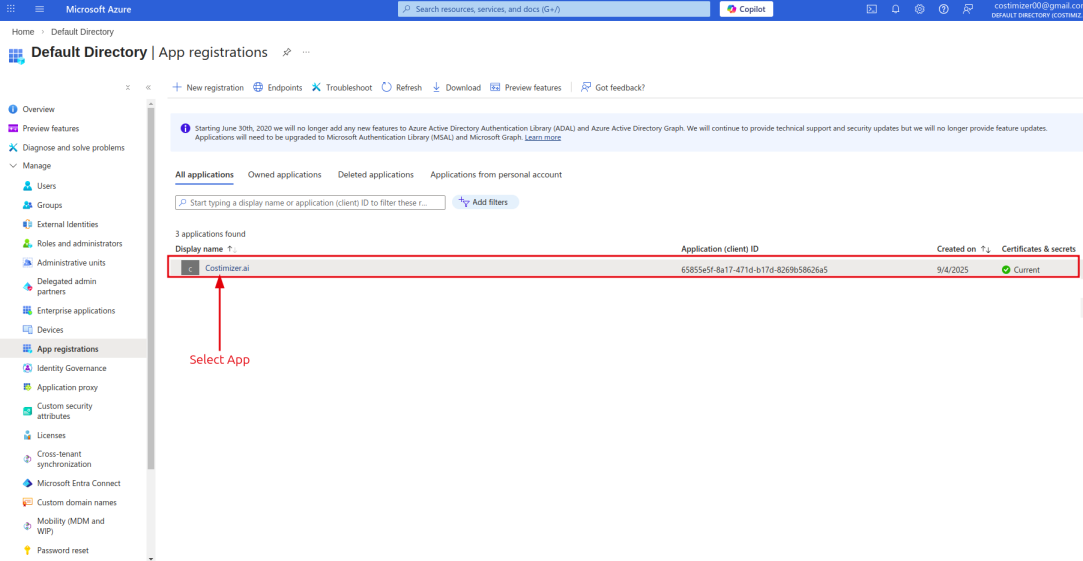
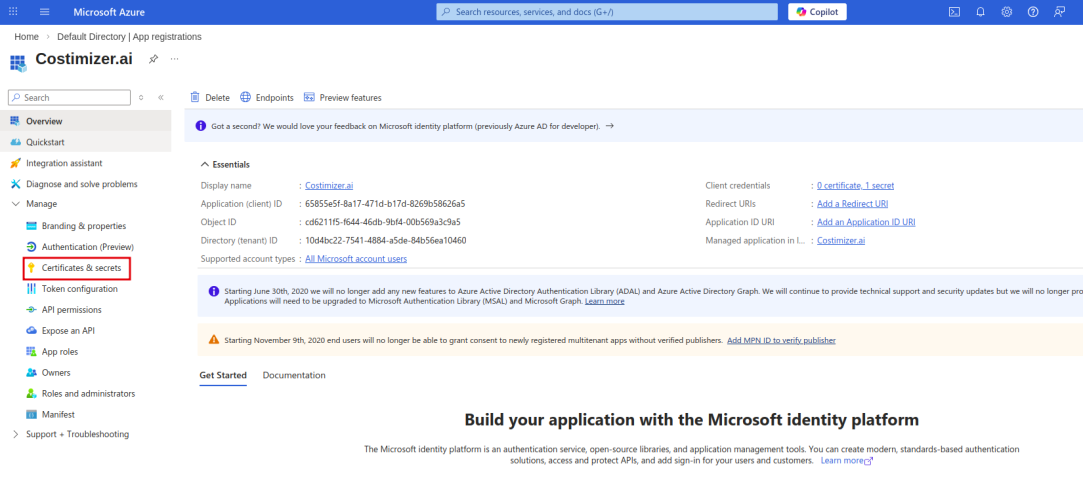
- Go to Entra ID → App registrations → your costimizer.ai app.
- Navigate to Certificates & Secrets.
- Click + New client secret. Add a description (e.g.,
costimizer-secret) and set an expiry (12–24 months recommended).
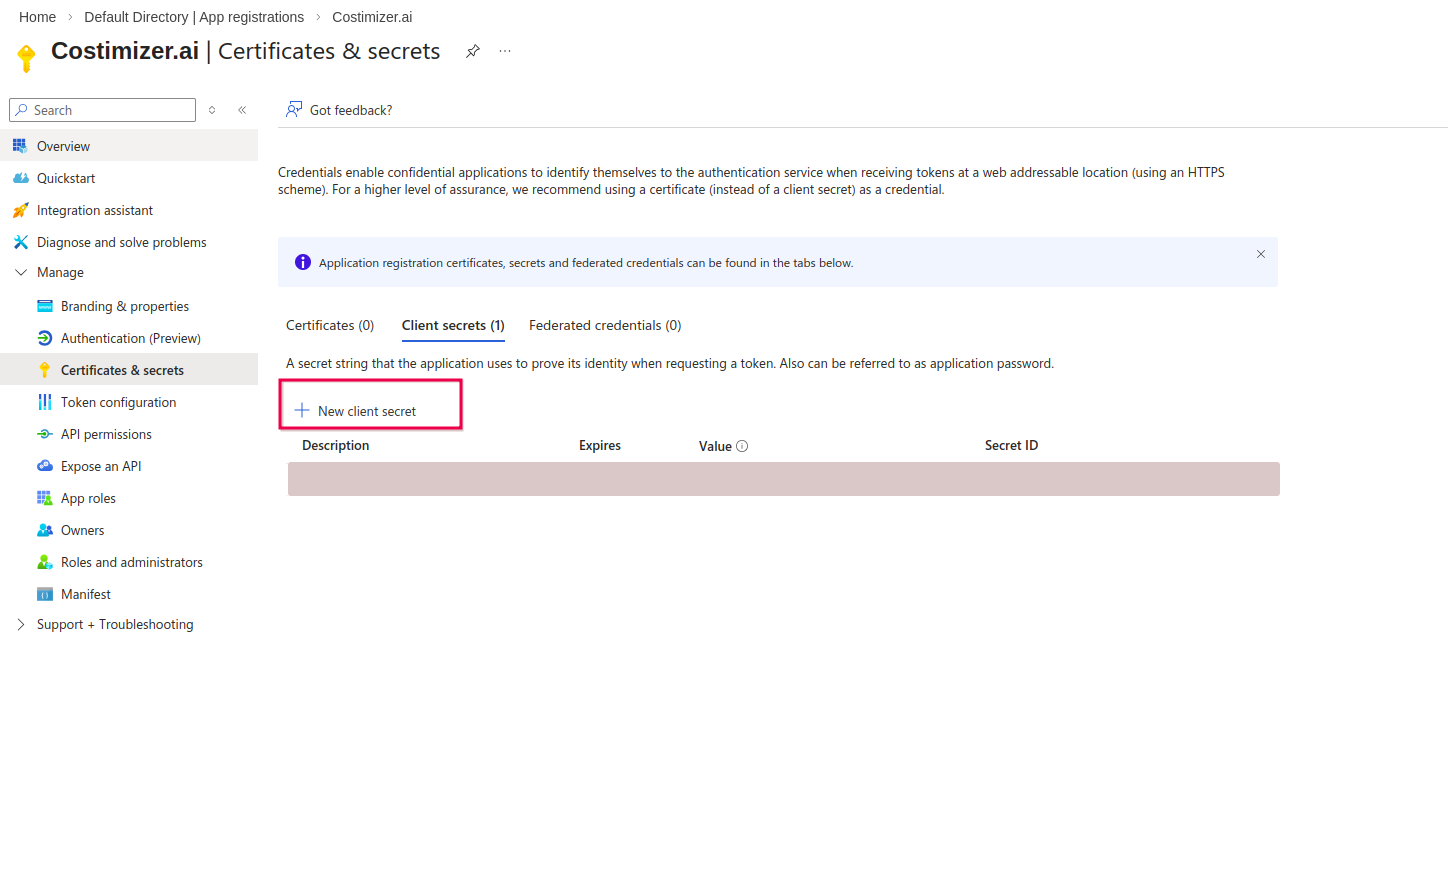
- Click Add.

Copy the Secret Value immediately. It is not shown again after you leave the page.
Connect in Costimizer UI
- Subscription
- Tenant
- Log in to Costimizer → Accounts → Connect Cloud Account → Azure.
- Select Subscription.
- Fill in:
- Name — a label (e.g.,
Azure Production) - Subscription ID
- Directory (Tenant) ID
- Application (Client) ID
- Client Secret
- Name — a label (e.g.,
- Click Connect.
Select Tenant instead of Subscription in step 2. You do not need to enter a Subscription ID. Fill in Tenant ID, Client ID, and Client Secret, then click Connect.
Costimizer will discover all subscriptions where the Reader role has been assigned.
Data availability
Initial data sync: a few hours. Billing export data: up to 24 hours. Once connected, costs will appear in the Costimizer dashboards, and the Resources section will begin populating.
Troubleshooting
| Issue | Resolution |
|---|---|
| Authentication failed | Verify Client ID, Secret, and Tenant ID are entered correctly |
| Permission error | Confirm the Reader role is assigned to the correct subscription(s) |
| Missing subscriptions | Check that the Reader role is assigned at the Tenant level, not just one subscription |
See Connection failures for more detail.