Connect Kubernetes
Summary
Kubernetes cost visibility in Costimizer uses an open-source metrics collector deployed via Helm. It collects pod-level and node-level usage data and sends it to Costimizer using Prometheus remote write.
This works with any Kubernetes cluster, self-managed or cloud-hosted (EKS, AKS, GKE).
Required role: Organization Manager or Manage Cloud Credentials
Estimated time: 20 minutes
Prerequisites
- Access to the Costimizer UI with the required permissions
- A running Kubernetes cluster
kubectlaccess to the target cluster- Helm v3+ installed on your machine
Create the Kubernetes data source in Costimizer
- Log in to Costimizer.
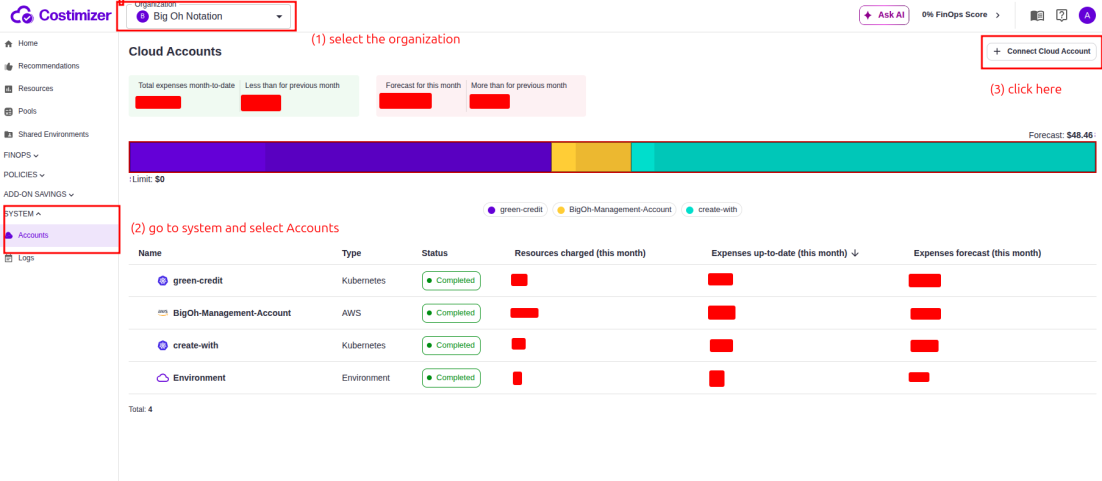
- Go to System → Accounts → Connect Cloud Account.
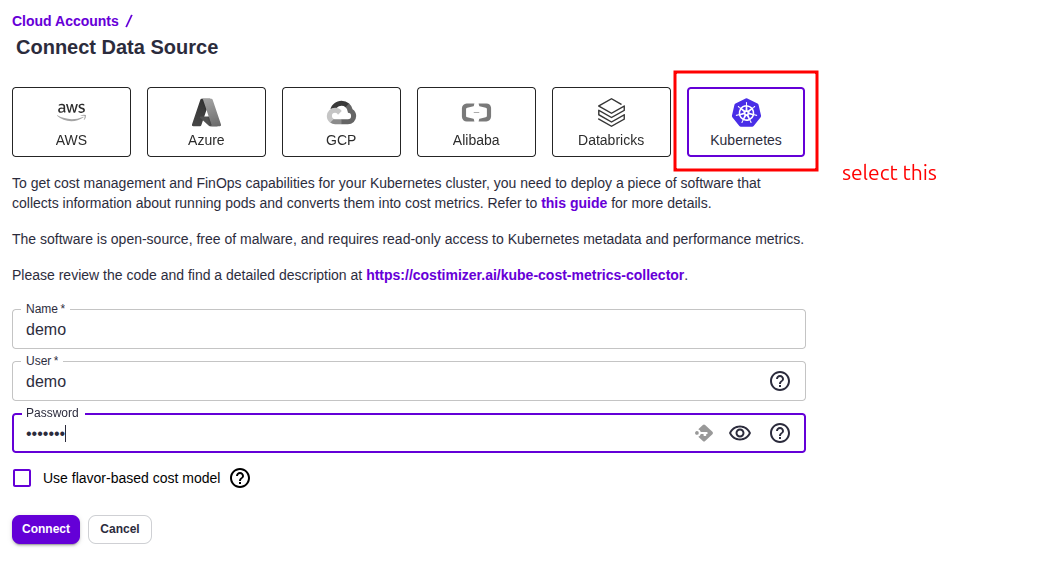
- Select Kubernetes.
- Fill in:
- Name — a meaningful label (e.g.,
prod-eks-cluster) - User — a username for the collector to use
- Password — a secure password for authentication
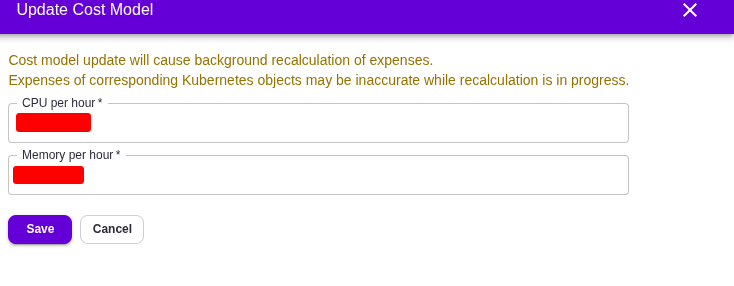
- Flavor-based cost model (optional): if enabled, Costimizer uses actual cloud provider pricing for node costs. If disabled, a default cost model is applied and can be adjusted later in the Nodes tab.
- Name — a meaningful label (e.g.,
- Click Connect.
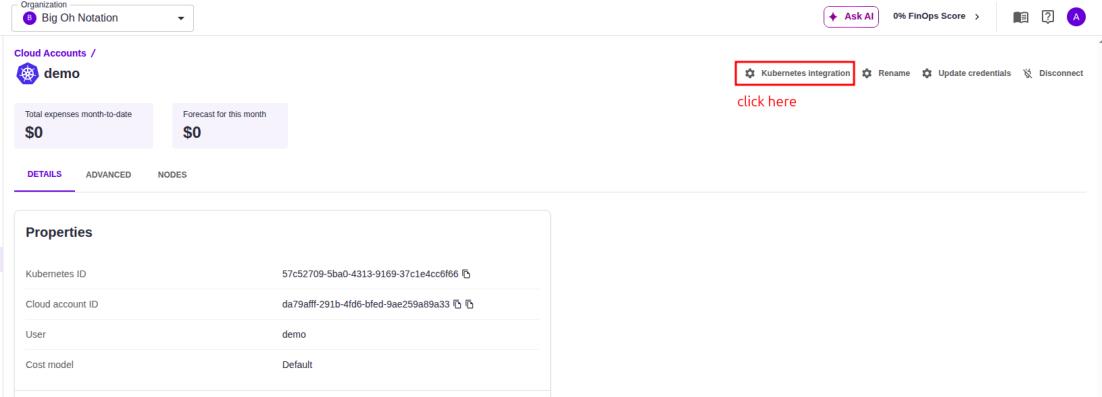
Verify account
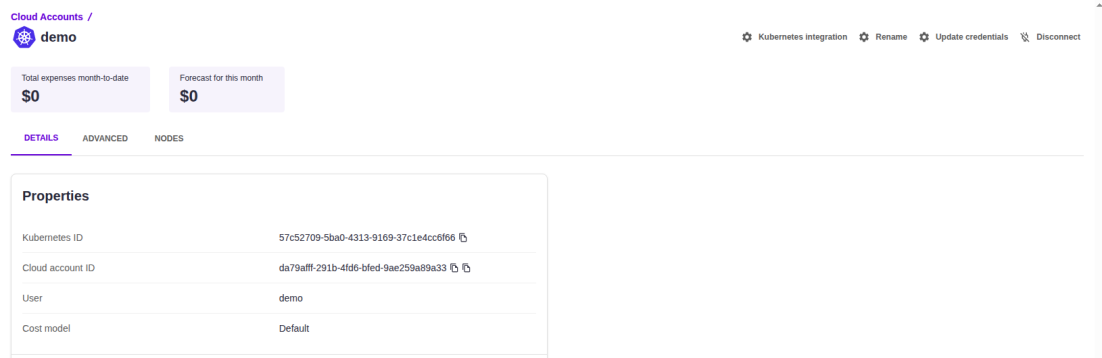
After connecting, review the Kubernetes account details page to verify your Kubernetes ID, Cloud Account ID, User, and Cost Model. Costs will initially display as $0 until metric generation begins.
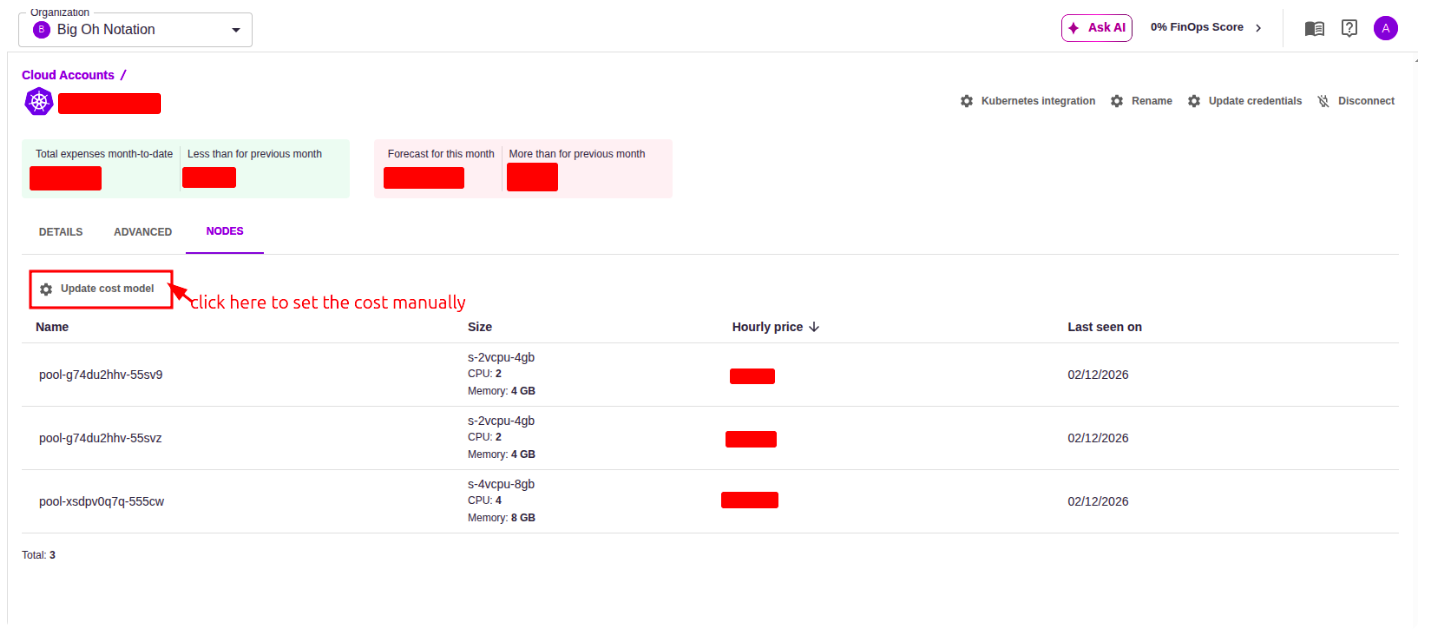
Setting up the cost model manually if the selected default model mentioned above:
Deploy the Helm collector
Step 1: Add Helm repo
Run this command on your local machine (pointed at the target cluster):
helm repo add costimizer https://costimizerinc.github.io/helm-charts
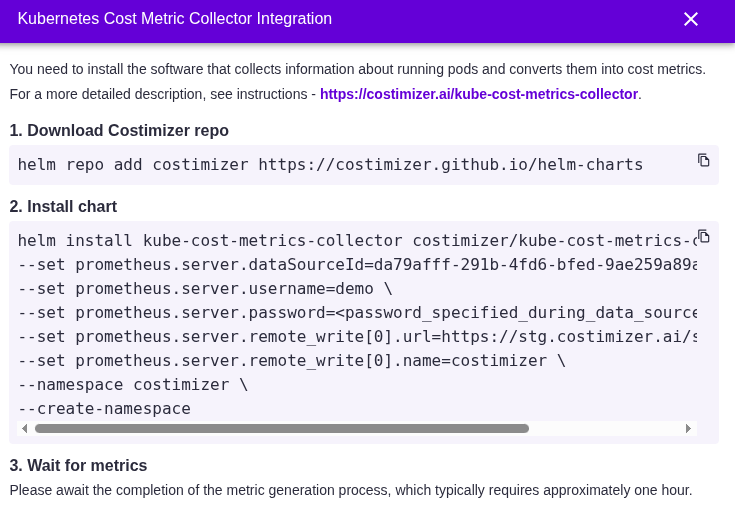
Step 2: Install collector
helm install kube-cost-metrics-collector costimizer/kube-cost-metrics-collector \
  --set prometheus.server.dataSourceId=<CLOUD_ACCOUNT_ID> \
  --set prometheus.server.username=<USERNAME> \
  --set prometheus.server.password=<PASSWORD> \
  --set prometheus.server.remote_write[0].url=https://stg.costimizer.ai/... \
  --set prometheus.server.remote_write[0].name=costimizer \
  --set prometheus.server.remote_write[0].basic_auth.username=<USERNAME> \
  --set prometheus.server.remote_write[0].basic_auth.password=<PASSWORD> \
  --set 'prometheus.server.remote_write[0].headers.Cloud-Account-Id=<CLOUD_ACCOUNT_ID>' \
  --namespace costimizer --create-namespace
Where to find your values
After creating the Kubernetes data source in Costimizer, click Kubernetes Integration (top-right of the account page). The modal shows the exact Helm install command pre-filled with your CLOUD_ACCOUNT_ID, USERNAME, and PASSWORD.
Validate cost data
After deployment, metric generation is not immediate. Once the collector is running, navigate to:
- Resources — to see Kubernetes workloads and node costs
- Pools — to view workloads organised by team or project
- Recommendations — to see Kubernetes-specific optimisation opportunities
Key takeaways
- Kubernetes costs = cluster infrastructure + pod requests + storage + networking
- Connect the parent cloud account first for complete cost picture
- Right-sizing pod requests often yields 15–25% savings