Power Schedules
Summary
Power Schedules let you automatically start and stop cloud instances on a fixed timetable. Once configured, Costimizer handles execution every day, with no manual work needed.
This works across AWS, Azure, GCP, and other providers.
This guide walks you through the full process:
- Navigating to Power Schedules
- Creating a schedule
- Configuring triggers
- Understanding what the list view shows after creation
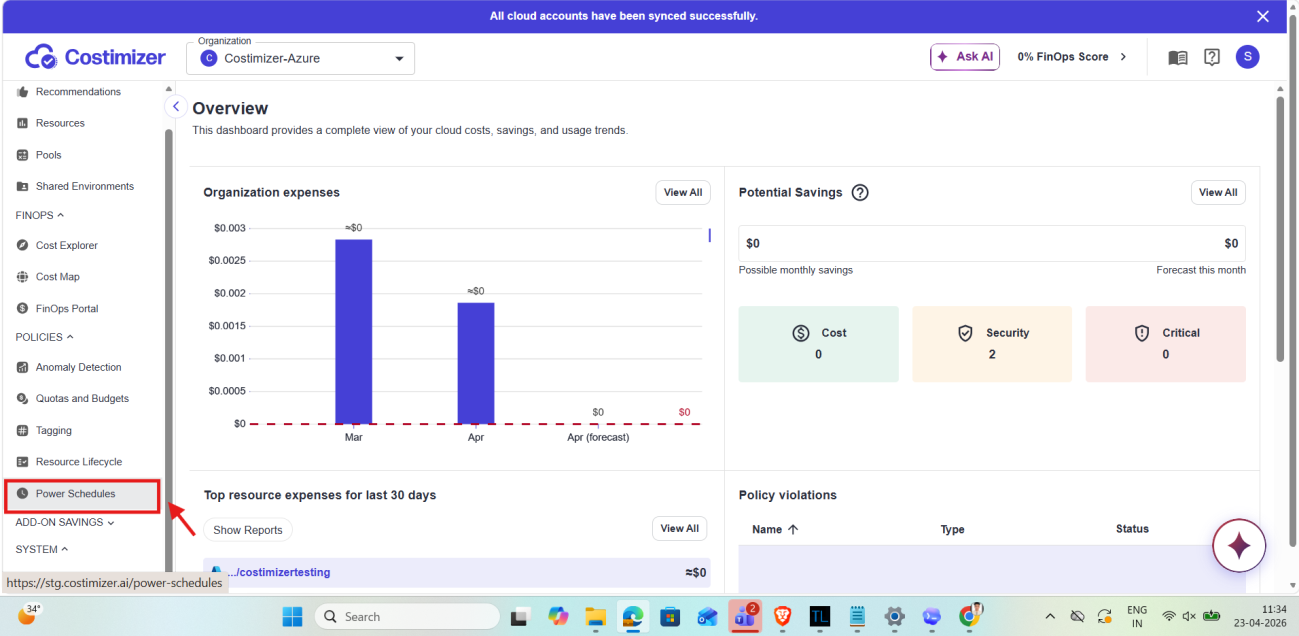
Getting to Power Schedules
- In the left navigation panel, locate the POLICIES section.
- Click Power Schedules below it.
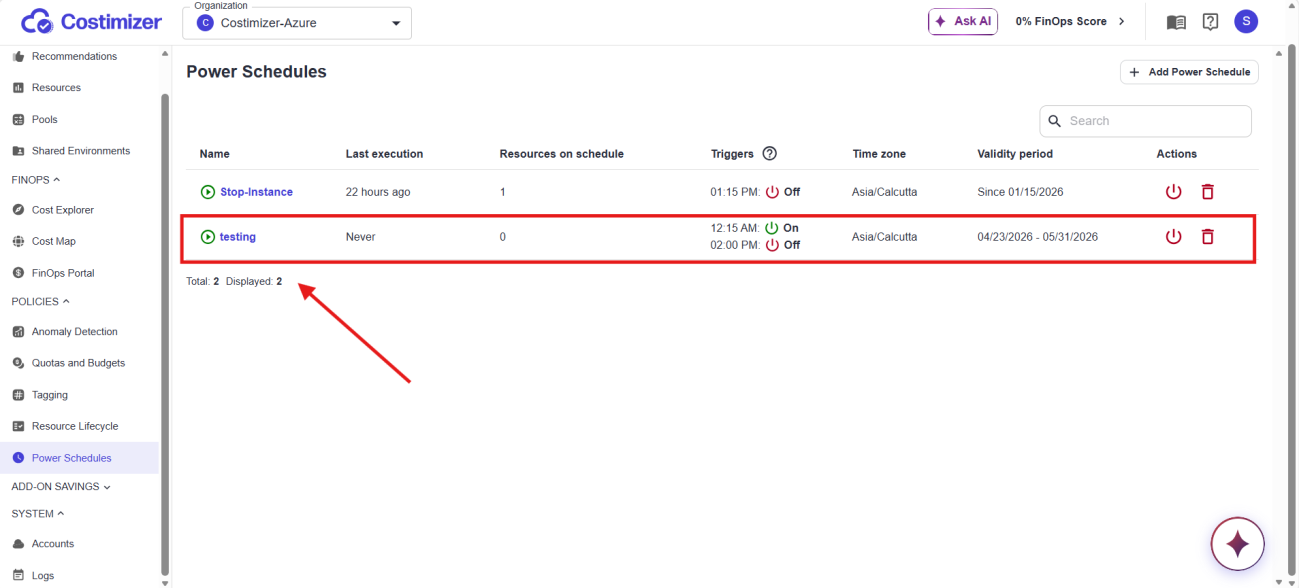
You land on the Power Schedules list page, your central view of all schedules in the organization.
Understanding the List Page
Each row in the table is one schedule. Here is what each column shows:
| Column | What it shows |
|---|---|
| Name | The schedule name. Click it to open the detail view for that schedule. |
| Last execution | When the schedule last fired a trigger. Shows Never for new schedules with no run history. |
| Resources on schedule | How many instances are currently assigned to this schedule. |
| Triggers | A summary of all on/off times set for this schedule, showing the time and state (On or Off) for each trigger. |
| Time zone | The time zone all trigger times are based on (for example, Asia/Calcutta). |
| Validity period | The active date range. Shows Since [date] if no expiry is set, or a start-to-end date range if configured. |
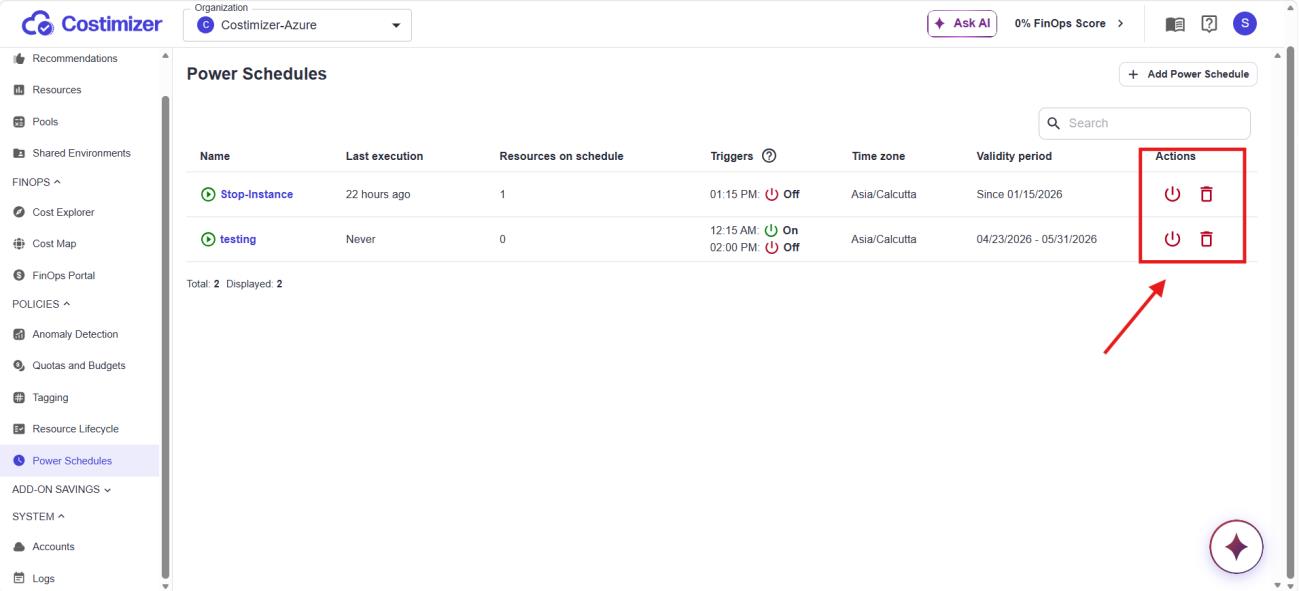
| Actions | Two icons per row. The power icon enables or disables the schedule. The trash icon permanently deletes it. |
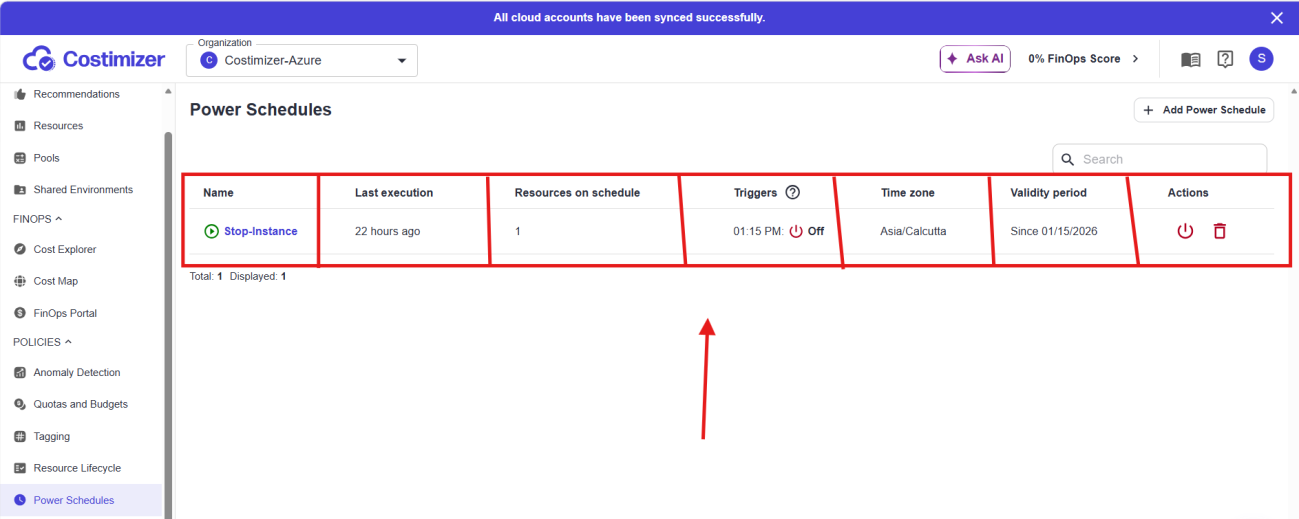
The + Add Power Schedule button sits at the top right of the page. This is your entry point for creating a new schedule.
Creating a New Power Schedule
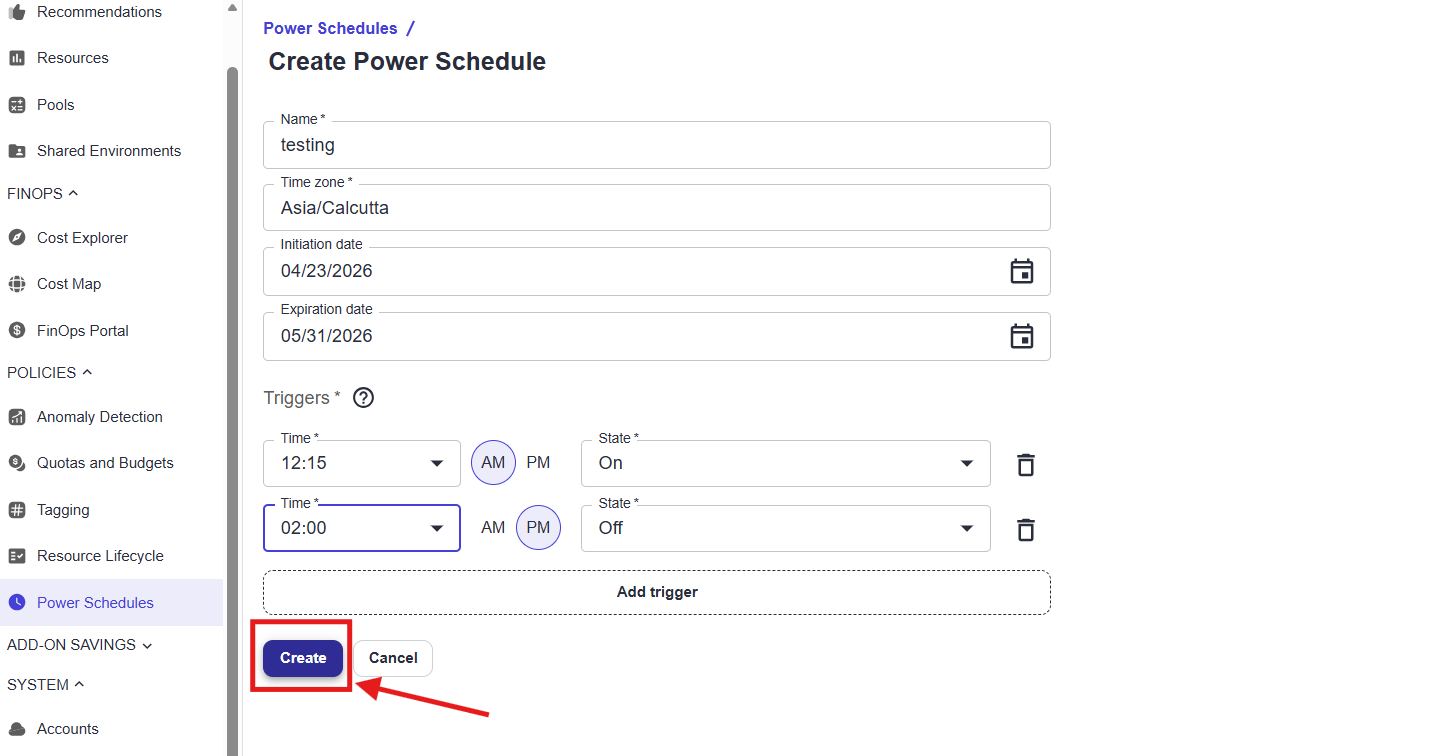
Click + Add Power Schedule. The Create Power Schedule form opens.
Step 1 — Enter a name
Click the Name field (required, marked with *) and type a descriptive label.
Use something that makes the purpose clear, for example:
Dev Servers WeekdaysGCP Staging Night Off
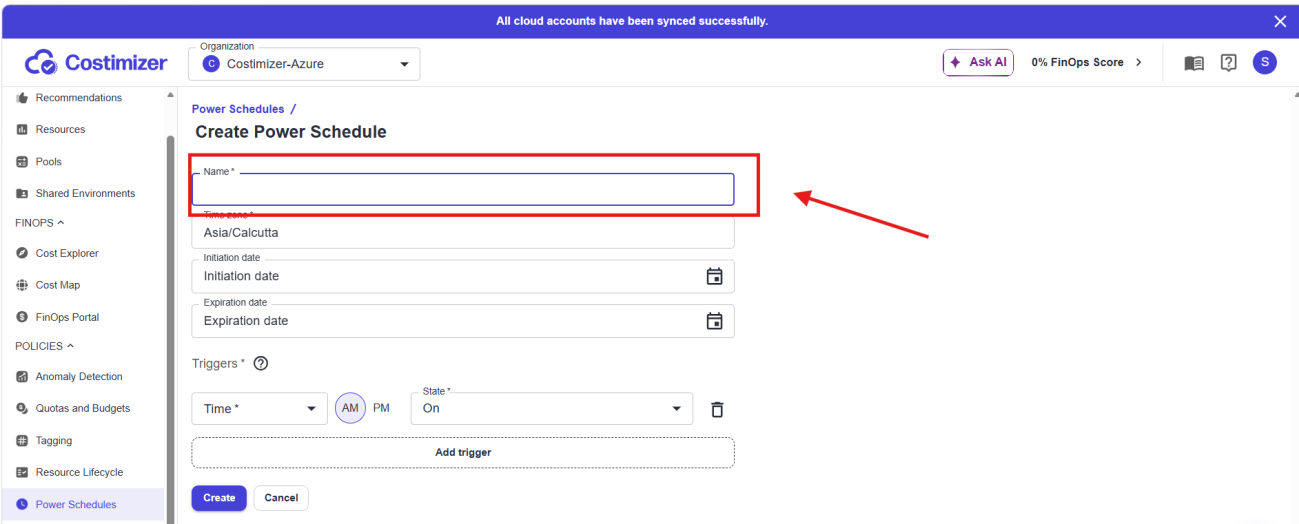
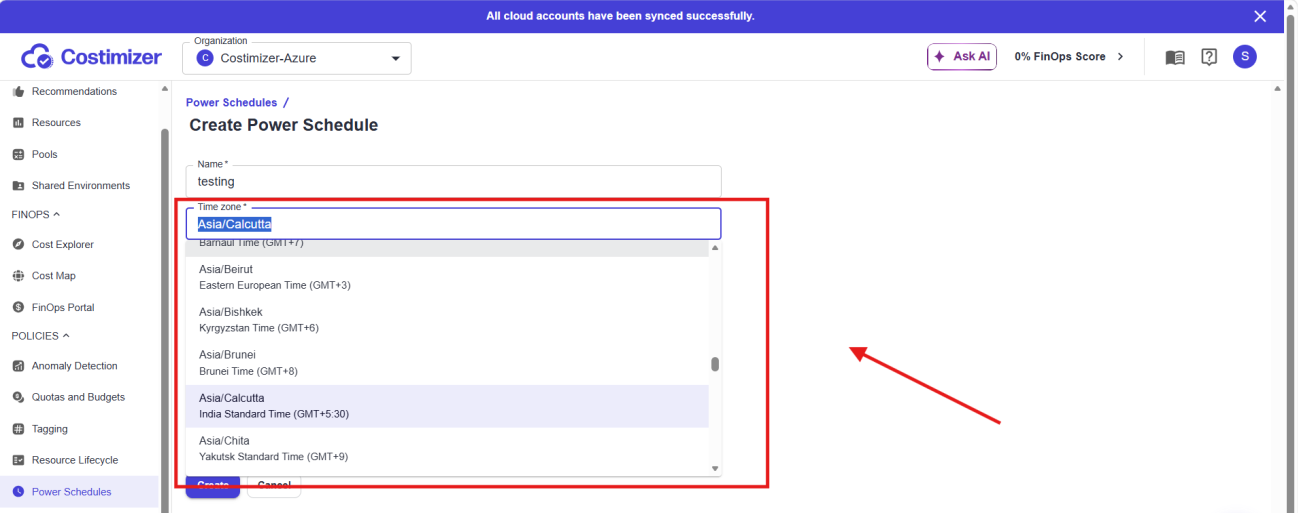
Step 2 — Select the time zone
Click the Time zone field (required). A searchable dropdown opens with the full IANA timezone list.
Type to filter. For example, type Calcutta to find Asia/Calcutta, which shows as India Standard Time (GMT+5:30). Click the entry to select it.
All trigger times in this schedule are interpreted in this timezone, so choose the one your team operates in.
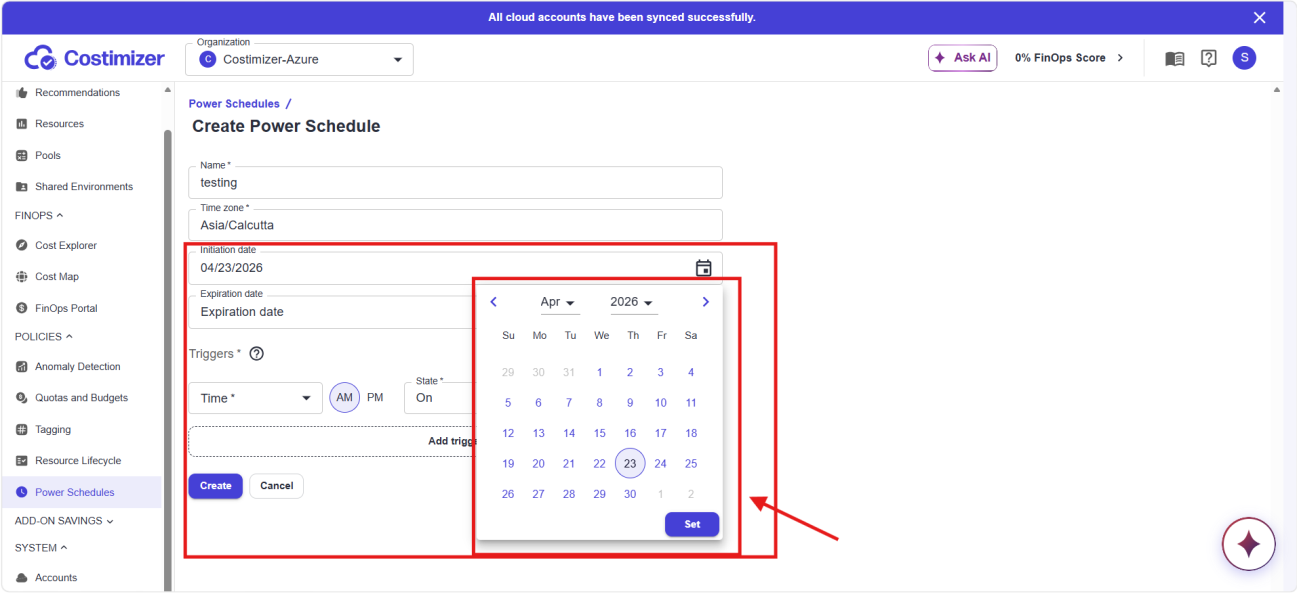
Step 3 — Set the validity period (optional)
Initiation date: When the schedule should begin running.
- Click the calendar icon to open the date picker
- Navigate months using the left and right arrows
- Click your target date
- Click Set
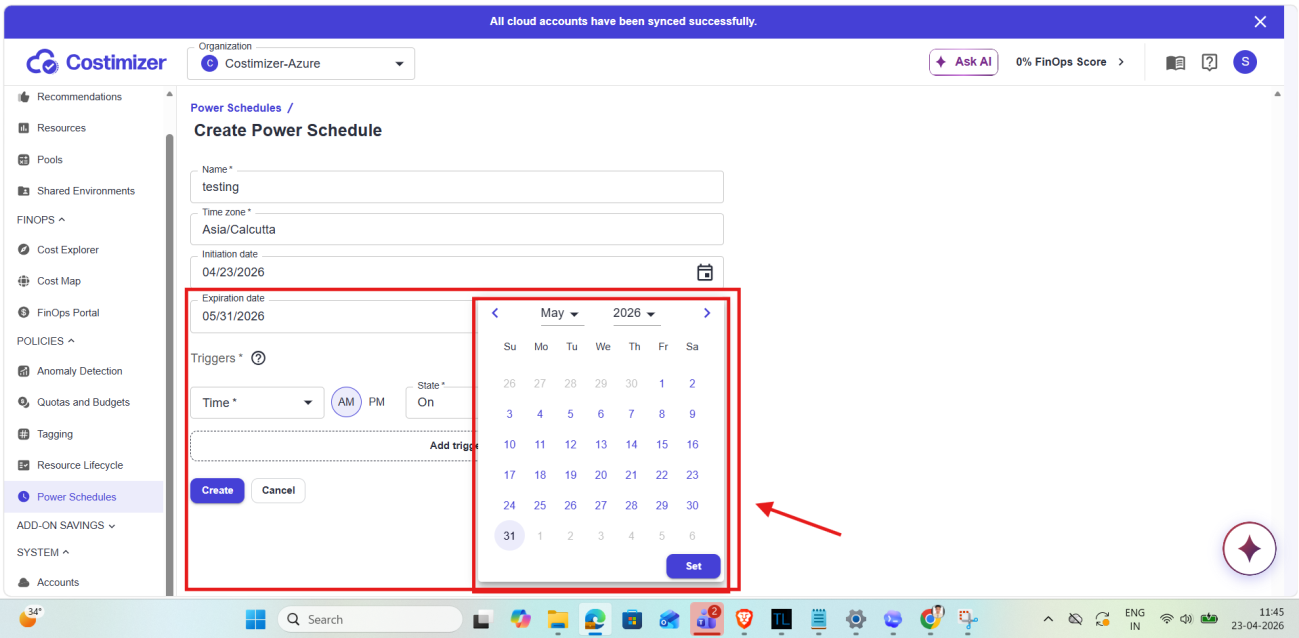
Expiration date: When the schedule should stop running.
- Same steps as initiation date
- Leave this blank if you want the schedule to run indefinitely
Both date fields are optional.
- Leave both blank: schedule starts immediately with no end date
- Set only initiation date: defined start with no expiry
- Set both: project- or sprint-bounded schedule that stops automatically when the period ends
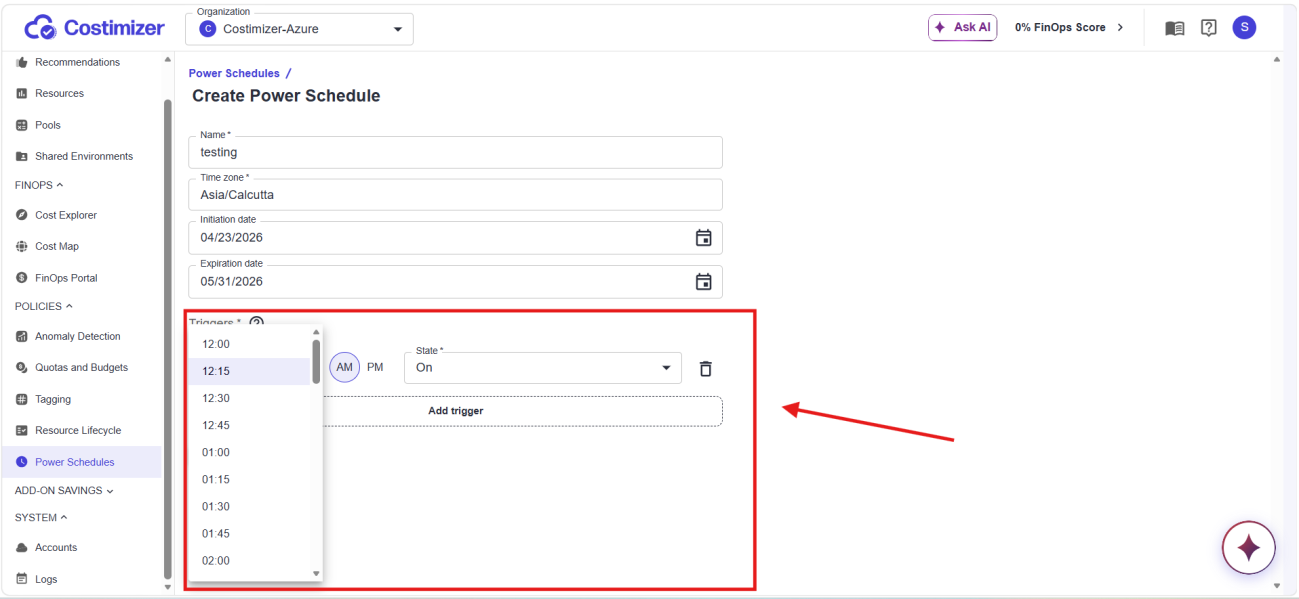
Step 4 — Configure triggers
Triggers define exactly when Costimizer acts on your instances. At least one trigger is required.
Each trigger row has three controls:
- Time: Dropdown showing times in 15-minute intervals (
12:00,12:15,12:30,12:45,01:00, ...11:45) - AM / PM: Two toggle buttons beside the time field
- State: Dropdown with two options:
On(Costimizer starts the instance)Off(Costimizer stops the instance)
To add more triggers, click Add trigger (dashed outline below existing trigger rows). A new row appears. Set its Time, AM/PM, and State independently.
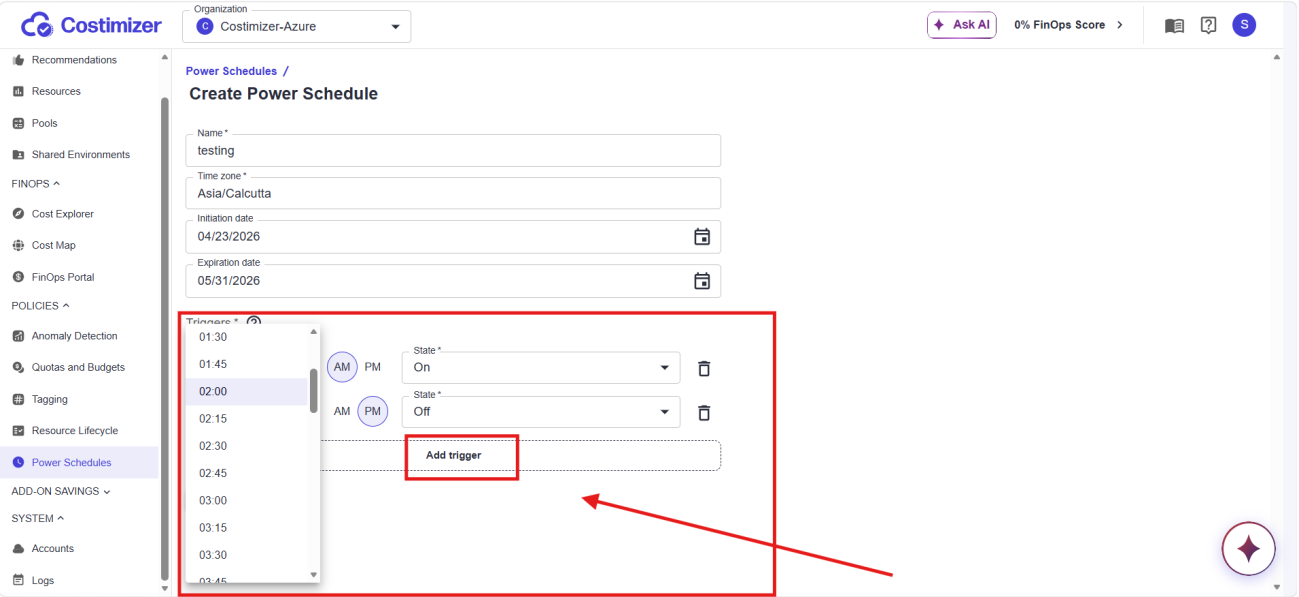
You can mix On and Off triggers in any combination.
A common setup is:
- On in the morning
- Off in the evening
For split-shift patterns, add multiple pairs, for example:
- On at 9 AM
- Off at 1 PM
- On at 2 PM
- Off at 7 PM
To remove a trigger, click the trash icon at the far right of that trigger row.
Step 5 — Click Create
Once all required fields are complete (Name and at least one Trigger), click Create.
If a required field is left blank, the form highlights it before submission.
Click Cancel at any time to discard changes and return to the list.
What Happens After Creating
Costimizer redirects you to the Power Schedules list. Your new schedule appears as a new row immediately.
What to expect in each column for a brand-new schedule:
- Last execution:
Never— schedule has not run yet. Updates after first trigger fires. - Resources on schedule:
0— no instances are assigned. Open schedule and add instances from the Instances tab in detail view. - Triggers: Shows each trigger in sequence with time and state, for example:
12:15 AM On / 01:00 PM Off. - Validity period: Shows configured range (for example,
04/22/2026 - 05/31/2026) orSince [date]if no expiry.
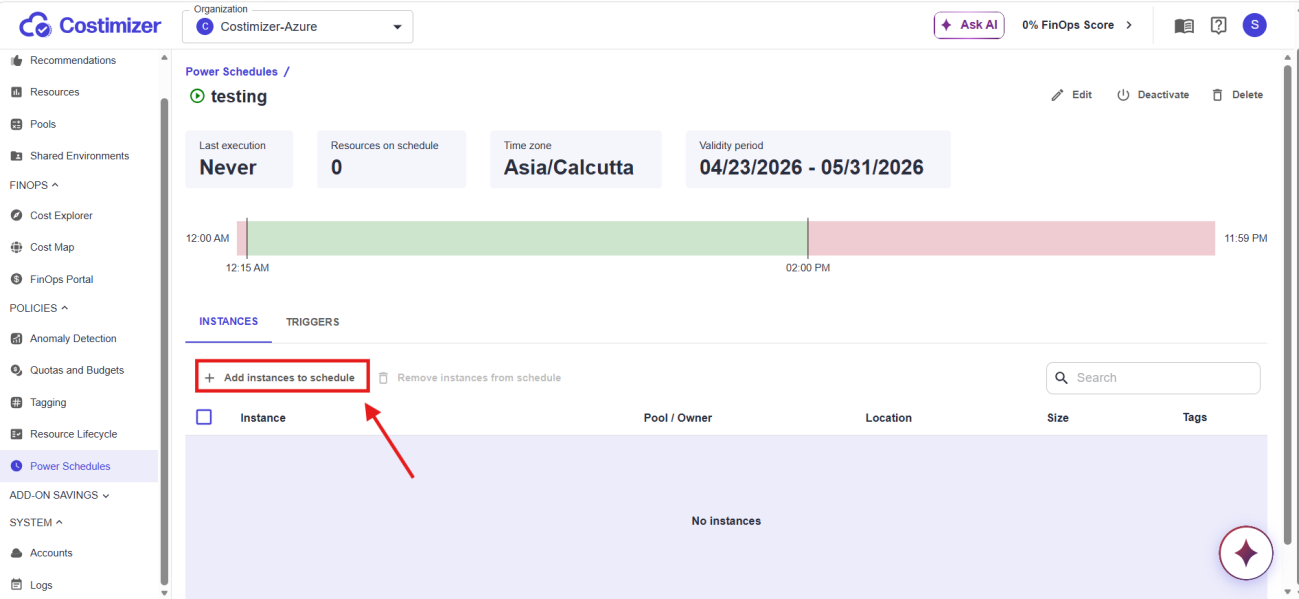
A newly created schedule is active immediately. If you are not ready for execution, click the power icon in the Actions column to disable it until instances are assigned and settings are confirmed.
Actions from the List View
Two icons appear in the Actions column of every schedule row:
| Icon | What it does |
|---|---|
| Power icon | Toggles schedule between active and inactive. Active schedules fire triggers on time. Inactive schedules keep settings but skip execution until re-enabled. |
| Trash icon | Permanently deletes the schedule and removes it from all assigned instances. This action cannot be undone. |
Disabling a schedule does not affect the current state of your instances. If they are already running, they stay running. The schedule only stops issuing future start/stop commands.
Required Cloud Permissions
For Power Schedules to work, the connected cloud account must have permission to start and stop instances.
| Cloud provider | Permissions required |
|---|---|
| AWS | ec2:StartInstances, ec2:StopInstances |
| Azure | Microsoft.Compute/virtualMachines/start/action, Microsoft.Compute/virtualMachines/deallocate/action |
| GCP | compute.instances.start, compute.instances.stop |
These permissions must be on the IAM role, service account, or access credentials used to connect the cloud account.
If a permission is missing, the trigger fails silently: the schedule may show as active, but no action is taken on the instance.
- AWS: Costimizer uses the Assumed Role configured during AWS setup. No extra steps if you followed the standard IAM role guide.
- Azure: Stop action calls deallocate, not just stop. Deallocating releases compute allocation so Azure stops compute billing.
- GCP: Service account needs at minimum Compute Instance Admin (v1) role, or custom role with
compute.instances.startandcompute.instances.stop.
Key Rules
- One schedule per instance — An instance can belong to only one Power Schedule at a time. To reassign, remove it from the current schedule first.
- Daily execution — Schedules run every day. There is no built-in weekday/weekend filter.
- Multiple triggers allowed — Add as many trigger rows as needed in one schedule.
- One time zone per schedule — All triggers in a schedule share the same time zone.
- Validity period is optional — Skip date fields for ongoing schedules; set expiry for project-specific schedules.
Want to learn more? Check out this post — How to set Power Schedules using Costimizer